Yoga Mat Alignment Lines: 5 Marks for Anatomy Aware, Repeatable Setup
Alignment lines work as repeatable visual anchors, most useful for beginners locking in basic poses and for experienced practitioners fine-tuning symmetry. Nicholas at Yune Yoga has watched practitioners use them to build muscle memory faster, drawing on biomechanics research and Yune Yoga’s own blog testing notes. The simplest way to use them: the center line marks your body’s axis, and the horizontal or diagonal marks guide where your hands and feet land.
TL;DR:
- Alignment lines serve as effective visual anchors primarily for beginners and those with subtle asymmetries to develop muscle memory and improve pose consistency.
- The most common markings are the center line, front-of-mat anchor, horizontal crossbars, diagonal guides, and width markers, each aiding specific pose alignments.
- Proper mat setup involves locating the front indicator, aligning the center line with your body’s midline, and adjusting for your natural proportions to maintain consistent practice.
- Printed guide marks are helpful for initial positioning but should be adapted to individual body geometry rather than forced to match the printed lines exactly.
- High-contrast minimal designs on eco-friendly, durable materials like natural rubber outperform busier or synthetic mats by maintaining visibility and grip through regular use.
Table of Contents
- What Yoga Mat Alignment Lines Actually Mean
- How to Set Up Your Mat for Repeatable Alignment
- Pose-by-Pose Cues for Using the Lines
- Where Alignment Lines Fall Short (and How to Fix It)
- What to Look for in a Mat With Alignment Lines
- Why Nicholas and Yune Yoga Trust This Guidance
- The Conventional Advice Gets This Half Right
- Find an Alignment-Friendly Mat Built for Daily Practice
- Sources
What Yoga Mat Alignment Lines Actually Mean
Most alignment-marked mats use some combination of five elements, though the exact layout varies by brand. Once you know what each one does, reading a mat becomes second nature within a few sessions.
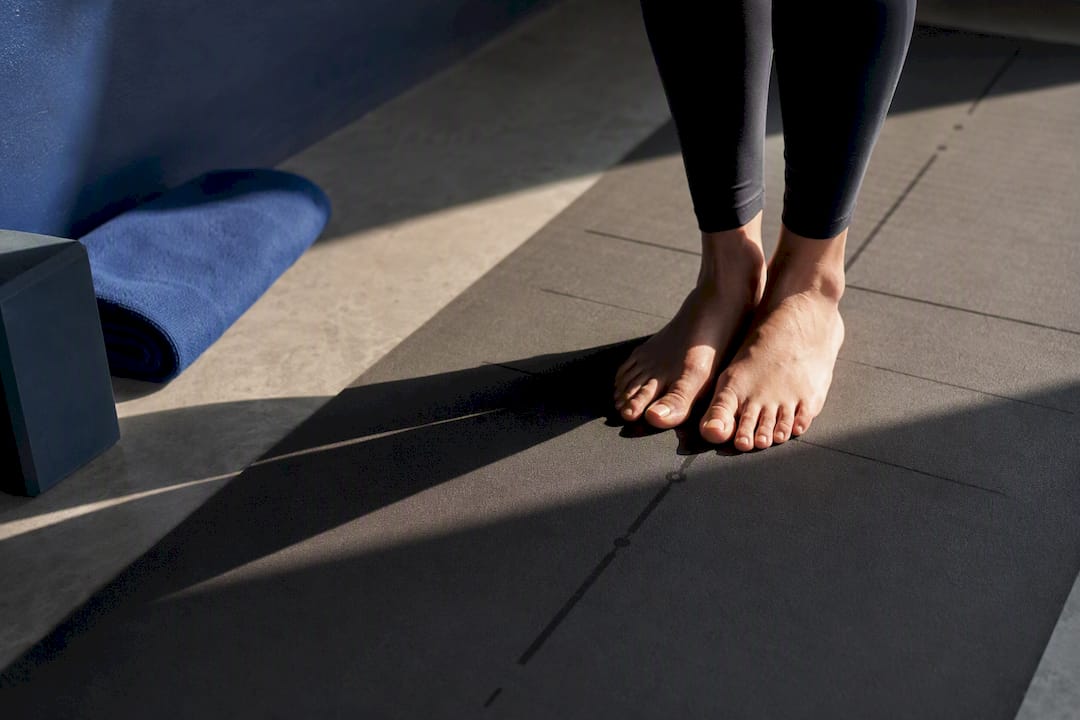
The center line runs the length of the mat and marks your body’s midline. It’s the most important reference on the entire surface, since nearly every other cue gets measured against it. When your nose, sternum, and navel track that line in a standing pose, you know your spine isn’t twisting off axis.
A front-of-mat anchor, usually a short mark or symbol near the top edge, tells you where to orient your body when you first step onto the mat. It matters more than it sounds like it should. Without a consistent front reference, your Downward Dog entry shifts a few inches every time you practice, and you lose the exact baseline you’re trying to build.
Horizontal crossbars run perpendicular to the center line at intervals down the mat’s length. These are your hand and foot placement guides for lunges, standing splits, and transitions where front-to-back spacing matters as much as side-to-side symmetry.
Diagonal guides, less common but showing up on higher-end designs, help with rotated stances like Warrior II or Extended Side Angle, where your feet aren’t parallel to the mat’s edges at all.
Width markers, small ticks along the sides, help you gauge how far your hands or feet have drifted from center without needing to stop and eyeball it.
Here’s the trade-off worth understanding upfront: these marks are a reference, not an absolute. A 2015 study on motor learning found that visual feedback and external cues improve movement reproducibility in balance tasks, which is exactly why lines work. But that same research points to reproducibility, not perfection. The lines give you a consistent starting point every time you practice, not a guarantee that a printed mark fits your particular hip width or shoulder span.
Common markings you’ll encounter, roughly ranked by how often they appear on retail mats:
- Center line (nearly universal on marked mats)
- Front-of-mat anchor or logo placement
- Horizontal crossbars at multiple intervals
- Diagonal guides (less common, found on premium designs)
- Width or side ticks for lateral drift
Alignment lines tend to help two groups the most: beginners still learning where their body should sit in space, and practitioners with enough mileage to notice subtle asymmetries lines expose. If you’ve ever finished a pose and felt “off” without knowing why, a printed guide often reveals the answer in seconds.
How to Set Up Your Mat for Repeatable Alignment
Before any pose work happens, the mat itself has to be oriented correctly. Skip this step and every downstream cue drifts.
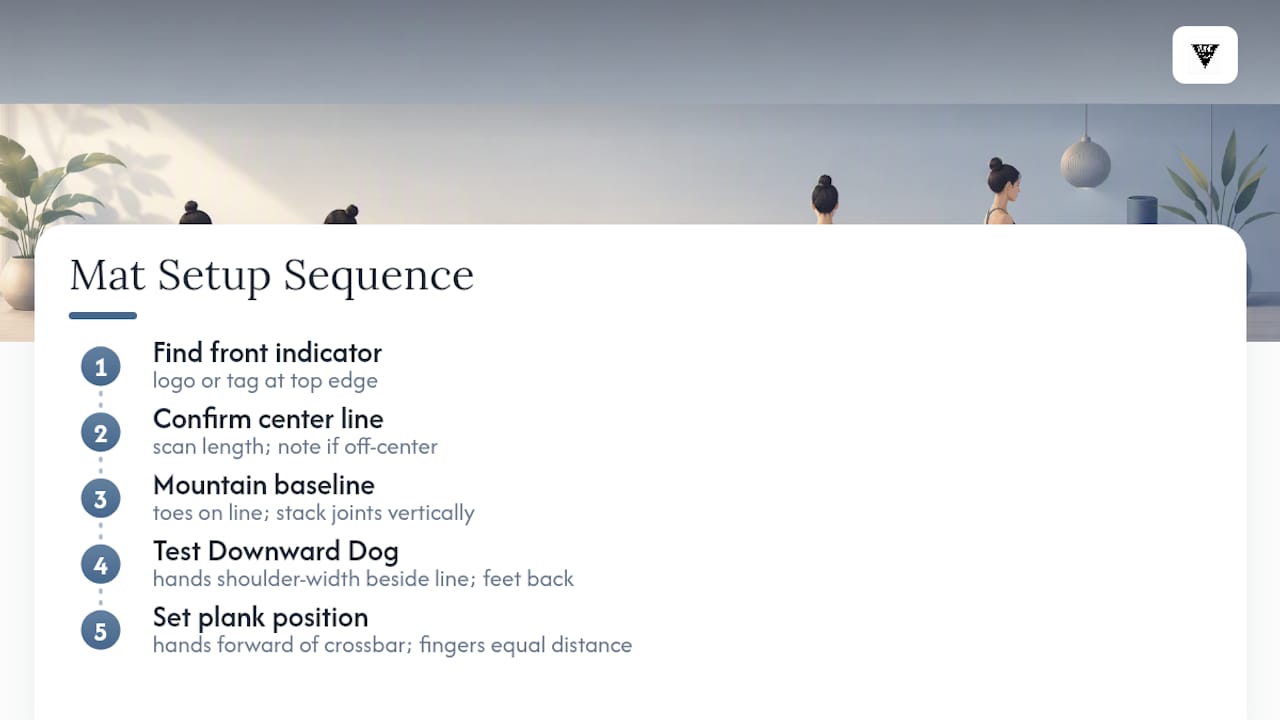
1. Find the front indicator. Most marked mats have a small logo, tag, or printed symbol near one short edge. That’s your top of the mat. Unroll it so that edge faces the direction you’ll be moving toward, whether that’s a mirror, a window, or simply the open end of your room.
2. Locate and confirm the center line. Run your eye down the mat’s full length before you step on. If the line looks slightly off-center (it happens with folded travel mats that have creased unevenly), note it now rather than mid-flow.
3. Set your Mountain pose baseline. Stand with your big toes touching the center line, heels slightly apart. Check that your ankle bones, hip points, and shoulder tips form a straight vertical stack directly above that line. This becomes your reference position for everything else.
4. Test Downward Dog entry. From Mountain, step or fold back so your hands land symmetrically on either side of the center line, roughly shoulder-width apart, using the nearest horizontal crossbar as your hand guide. Your feet should land the same distance from center as your hands, just farther back.
5. Set your plank position. Walk your hands slightly forward of the shoulder crossbar if your mat has one, keeping index fingers equidistant from the center line. Glance down. If one hand sits noticeably closer to the line than the other, that’s your asymmetry showing up before you even move into the pose.
Product guidance from mat manufacturers generally echoes this same sequence: unroll the mat, align the center line with your body’s midline, then use the printed guides to check hand and foot placement before settling into a hold.
Bodies don’t come in one size, so the lines need translating rather than obeying to the millimeter. If your arms are longer than average, your hands may naturally fall between crossbars rather than exactly on one. That’s fine. Use the nearest mark as a starting reference, then adjust by a consistent proportional amount, say, one thumb-width past the line, every time you practice that pose. The goal is your own repeatable offset, not forcing your skeleton to match a printed grid designed for an average build.
Pro Tip: If you travel with a different mat than your home one, or your foldable travel mat has no lines at all, mark a small dot with a fabric pen on the top edge where your big toe naturally lands in Mountain pose. That single reference point recreates your alignment baseline on almost any surface, marked or not.
Pose-by-Pose Cues for Using the Lines
Standing poses, balances, arm balances, and seated hip openers each use the mat’s markings differently. Treating them the same way is one of the more common mistakes practitioners make once they’ve got the basic setup down.
Standing poses
In Mountain, Warrior I, and Warrior II, your feet relate to the center line in distinct ways depending on the shape. For Mountain and Warrior I, both feet should sit an equal distance from the center line, mirrored left and right, which is easy to verify with width markers if your mat has them. For Warrior II and Triangle, your front heel typically lines up roughly with the arch or heel of your back foot, a relationship the horizontal crossbars make visible at a glance instead of requiring you to guess the distance.
Knee tracking is where lines earn their keep in standing work. In a lunge or Warrior I, your front knee should stay stacked over your ankle, not drifting inward toward the center line or outward past your pinky toe. Glance down mid-pose. If your knee has collapsed toward the mat’s midline, that’s a cue to press it back out, not to force your foot to match the mark exactly.
Forward folds and standing splits
Symmetrical forward folds like Standing Forward Bend rely on both feet sitting equidistant from center, weight distributed evenly through both big toes and both heels. Standing splits complicate this because your standing foot needs to stay anchored near the center line while your lifted leg swings free. Use the line to keep your standing foot honest. Don’t try to force the lifted leg’s foot to track anything, since hip mobility varies too much for that to make sense.
Balancing poses
This is where alignment lines do some of their most useful work. In Tree pose or Eagle, your standing foot’s position relative to the center line becomes the fixed point your whole structure organizes around. A 2022 review of postural control found that external cues and small positional markers measurably improve balance performance compared to relying on internal sensation alone, which tracks with what most practitioners notice: fixing your gaze on a spot near the line steadies the whole pose faster than closing your eyes and guessing.
Practical cues for balances:
- Keep your standing foot’s centerline position fixed as your primary anchor.
- Let your gaze (drishti) land on a point just past the mat’s front edge, not on your wobbling limbs.
- Check pelvis and shoulder alignment against the center line every few breaths, since balance poses tend to drift the longer you hold them.
- Make micro-adjustments in inches, not restarts. Shifting weight slightly toward center beats stepping down and resetting every time.
Arm balances
Crow pose, Side Crow, and Eight-Angle pose put your hands, not your feet, on the alignment marks. Hands should land symmetrically on either side of the center line, using a horizontal crossbar as your width reference if the mat has one at the right spot. Elbow alignment matters just as much here. Both elbows should bend to roughly the same angle, which you can check by comparing their distance from the center line at the bottom of the bend. An uneven bend usually means one side is compensating for weaker core engagement, and the mat’s marks make that visible in a way that just “feeling” the pose often doesn’t.
Seated and hip-opening poses
In poses like Seated Forward Fold, Bound Angle, or Half Lord of the Fishes, your pelvis is the piece that needs centering, not just your feet. Sit with your sitting bones equidistant from the center line before folding or twisting. In Bound Angle, let your knees fall where your hip mobility allows. Don’t force them toward matching width markers, since hip anatomy varies enough that two people in “correct” Bound Angle can have knees at noticeably different heights.
A useful rule across all four groups: use the line to check your starting symmetry, then let internal sensation guide you once you’re moving. The mark sets up the pose. Your body finishes it.
Where Alignment Lines Fall Short (and How to Fix It)
No printed line accounts for the fact that human bodies aren’t standardized. Limb length, hip width, and shoulder structure vary enough that a mark calibrated for one build will sit slightly wrong for another. That’s not a flaw in the mat. It’s just a limitation worth knowing about before you start treating a printed guide as gospel.
The most common mistake is forcing a joint to match a mark instead of using the mark as a rough target. If your natural stance in Warrior II puts your front knee slightly inside a crossbar, wrenching it outward to hit the line exactly usually creates more strain than it solves. A related mistake: misorienting the mat itself, unrolling it backward so the “front” anchor faces the wrong direction, which throws off every pose that follows without you noticing why.
Grip and cushion issues compound the problem. If a mat is slipping under sweaty palms, no amount of precise hand placement on a horizontal crossbar matters, because your hands are sliding off the mark anyway mid-pose. Fixing traction issues, covered in more detail in Yune Yoga’s guide to preventing mat slippage, often solves alignment complaints that look like a marking problem but are actually a grip problem.
Quick troubleshooting steps when a pose feels “off” despite following the lines:
- Measure your actual proportions against the mat once, standing in Mountain pose, and note where your natural landmarks fall relative to the printed marks.
- Record a short video or check a mirror from the front rather than relying on how the pose feels internally, since felt symmetry and actual symmetry often disagree.
- Use proportional adjustments (an inch past the line, a thumb-width off center) instead of forcing an exact match once you know your natural offset.
Research on movement variability backs this proportional approach. A 2022 Frontiers analysis found that external cues can reduce repetitive strain by improving motor patterns over time, but only when those cues get adapted to the individual rather than treated as fixed targets everyone must hit identically.
Pro Tip: Lines are a starting point, not a rulebook. Practitioners who get the most out of them treat the mark as “close enough, adjust from here” rather than “must land exactly here every time.”
What to Look for in a Mat With Alignment Lines
Not every marked mat is equally usable. Some designs cram in so many lines, diagonals, and width ticks that the surface looks more like a technical diagram than a practice tool, and busy patterns are genuinely harder to read mid-pose than a clean, minimal design.
The most usable layouts stick to a high-contrast center line plus one or two horizontal crossbars, maybe a diagonal guide if the mat targets rotated standing poses specifically. Anything busier starts working against you instead of for you, because you spend more time deciphering the pattern than actually holding the pose.
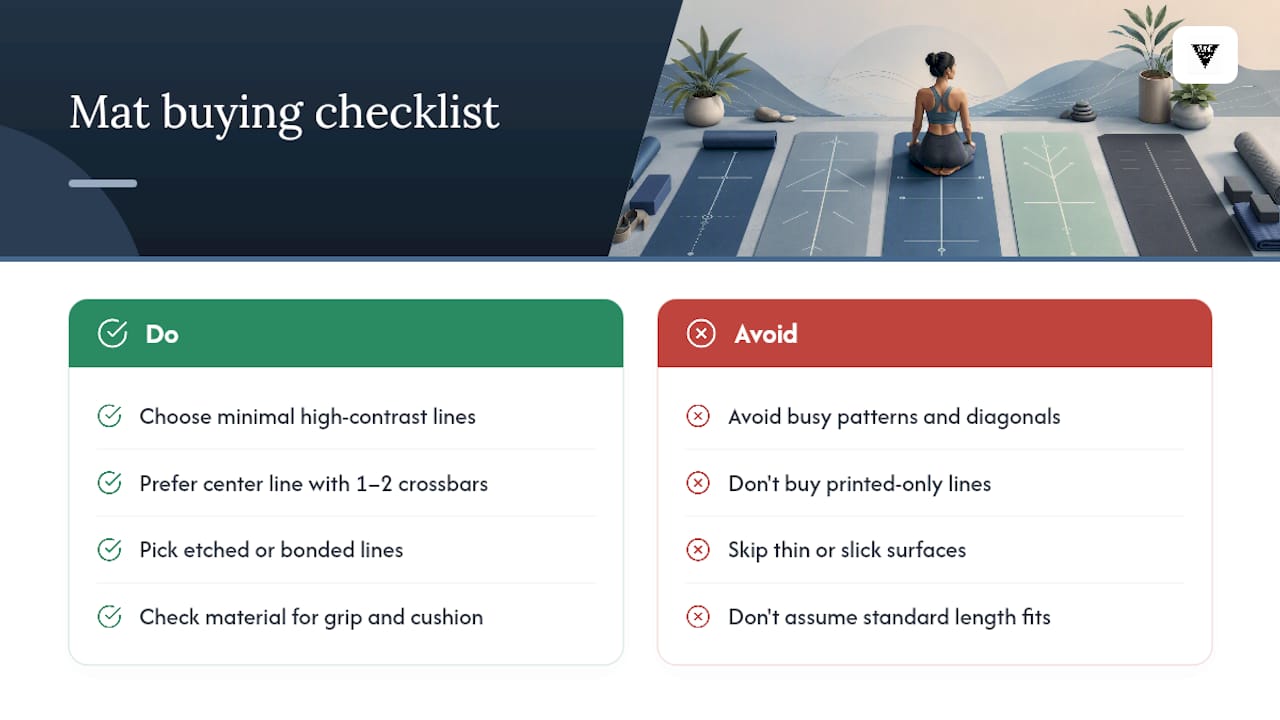
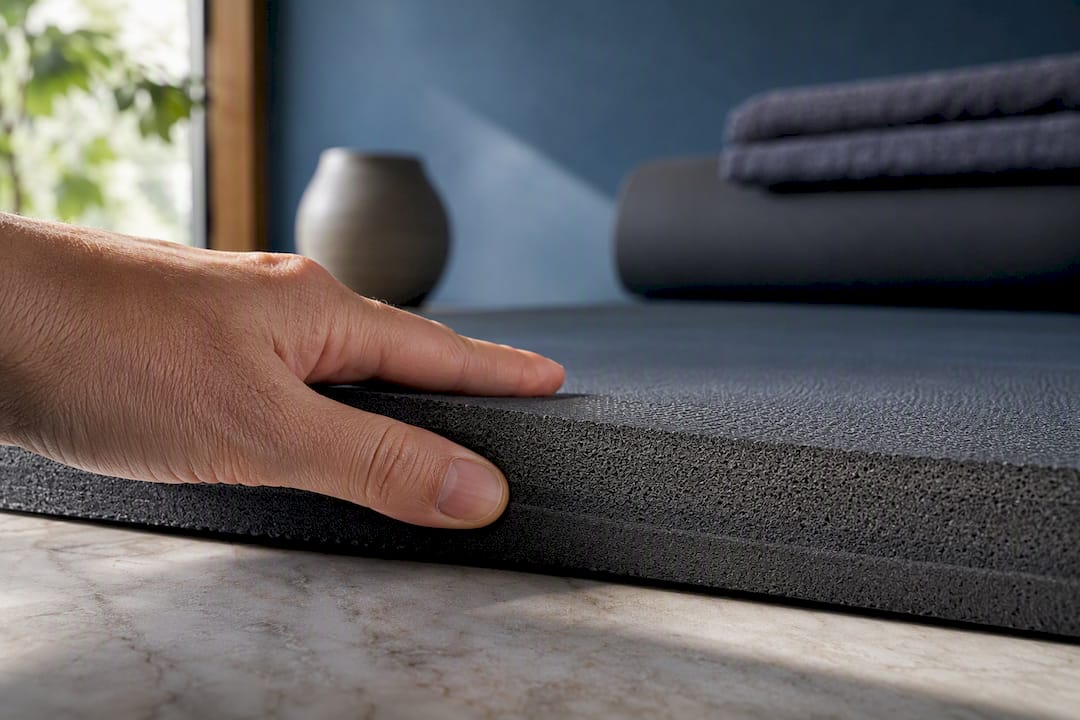
Material affects how well those lines actually function over time, not just how they look on day one. Natural rubber mats tend to offer strong adhesive grip that keeps hands and feet anchored right where you placed them against a mark. Cork surfaces can grip even better once slightly damp with sweat, which matters if you practice a sweatier style. Eco-friendly polyurethane surfaces tend to hold printed or etched lines with more consistent longevity than budget PVC alternatives. Yoga Journal’s comparison of non-toxic mat materials found natural rubber and eco-PU surfaces generally deliver the grip and line durability practitioners care about most, which lines up with what Yune Yoga has observed testing its own foldable travel mats against daily studio use.
Etched or bonded lines, where the pattern is pressed or lasered into the material rather than printed on top, tend to outlast surface-printed designs by a wide margin. A printed line on a heavily used mat can visibly fade within months, especially at the high-friction spots where hands and feet land most often. An etched line simply doesn’t have a layer to wear off.
A quick note on sizing: most alignment-marked mats run in the standard 68 to 72 inch length range, which fits the vast majority of practitioners without lines running off the usable surface. Taller practitioners (above roughly six feet) should check for extended-length options, since a standard mat can put the front anchor mark uncomfortably close to your heels in longer standing poses.
Before buying, it helps to understand broader material trade-offs across the full range of mat surfaces, since grip, cushion, and line visibility all interact rather than working independently. A mat can have gorgeous, precise lines and still frustrate you if the surface underneath them is too thin or too slick to hold a pose.
Why Nicholas and Yune Yoga Trust This Guidance
Nicholas writes on alignment, mat design, and practice fundamentals for Yune Yoga, drawing on both the biomechanics research behind cueing and hands-on observation of how practitioners actually use marked mats day to day.
Yune Yoga’s own product testing has repeatedly pointed toward the same conclusion this guide leans on: simple, high-contrast alignment patterns outperform busy ones, and eco-friendly materials like natural rubber hold their printed or etched guides longer under regular use than cheaper synthetic surfaces. That observation shaped how the team evaluates every eco-friendly mat added to the Yune Yoga collection.
For readers who want to go deeper on specific mat features, Yune Yoga’s guide to choosing the ideal mat covers traction and cushioning trade-offs in more depth, and the review of alignment-focused mat design walks through how one popular marked mat handles grip alongside its printed guides.
The Conventional Advice Gets This Half Right
Most guides treat alignment lines as either gimmicks or gospel, and both takes miss the actual value. The lines aren’t decoration, and they’re not a substitute for knowing what a pose should feel like from the inside.
What the research on external cues actually supports is narrower and more useful: a visual anchor speeds up how fast you build a repeatable, symmetrical setup, especially early in learning a pose. That’s a real mechanical advantage, not a marketing claim. Where conventional advice falls short is in treating every printed mark as something your body must match exactly. Nobody’s hips are printed on a factory template, and a mat that assumes otherwise will frustrate more people than it helps.
Prioritize this instead: use the center line to catch your starting symmetry, adjust proportionally for your own proportions, and stop checking the marks once you’re settled into the pose. The line’s job is to get you into position fast and consistently. Your body’s job is to take it from there.
— Nicholas
Find an Alignment-Friendly Mat Built for Daily Practice
Yune Yoga’s collection is built around exactly the trade-off this guide covers: clean, minimal marking patterns on natural rubber and eco-friendly foldable surfaces that hold their grip and their lines through regular use, not just a first unboxing. That combination, simple design plus a material that doesn’t fade or slip, is what makes a marked mat actually useful in practice instead of just on a store shelf.
If you’re shopping for a mat that supports repeatable setup without turning your practice space into a diagram, browse the current Yune Yoga collection and check which eco-friendly materials and sizes fit your practice. For readers still weighing grip and traction questions before committing, Yune Yoga’s tips for preventing slippage during intense sessions is worth a read alongside your mat search.
Sources
- PubMed: visual feedback improves motor learning (2015)
- PubMed: external focus and postural control (2022)
- Frontiers in Sports and Active Living (2022)
- Yoga Journal: Best non-toxic yoga mats (2026-04-22)
- Rodusuite product page: yoga mat with alignment guides