Spine Safe Supine Hamstring Stretch With a Strap for Beginners, 20–30s Holds
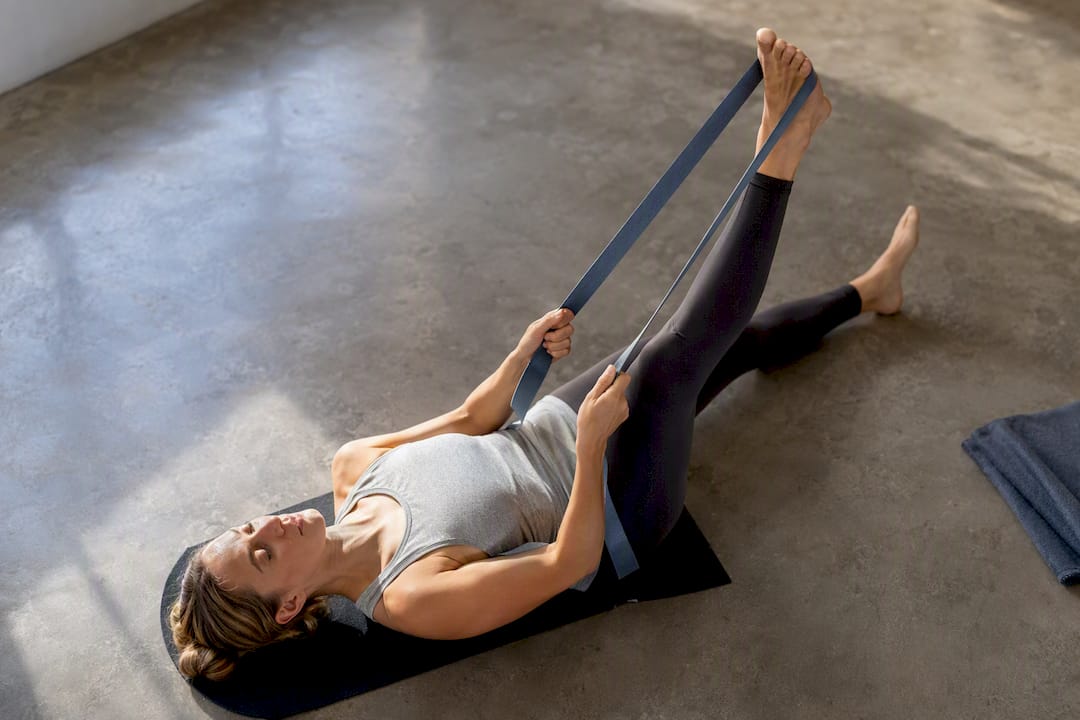
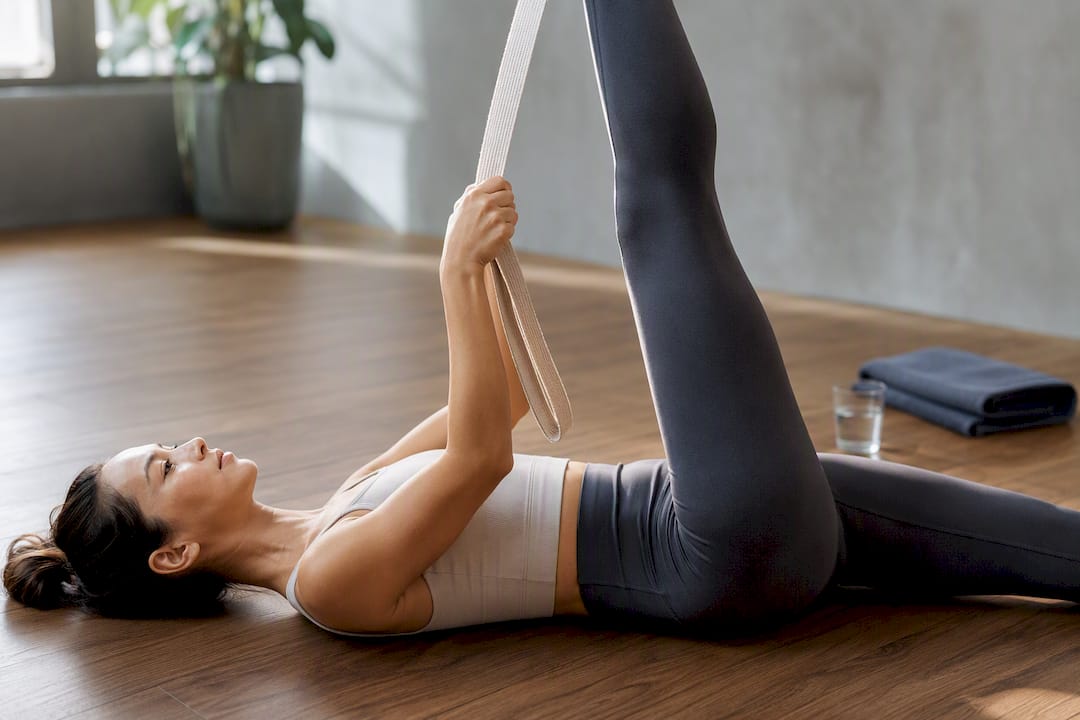
Lie on your back, loop a strap around the arch of one foot, and straighten that leg toward the ceiling while your spine stays flat on the floor. Hold each rep for a short, comfortable duration and repeat multiple times per side. This supine version protects your lower back better than standing or seated hamstring stretches because the floor supports your pelvis while the strap does the reaching for you.
TL;DR:
- A supine hamstring stretch with a strap reduces lower back strain better than standing versions because the floor supports the pelvis and prevents arching.
- Using a non-stretch yoga strap around six feet long with a D-ring buckle provides the most control and comfort during stretching sessions.
- Beginners or those with back pain should start with bent-knee or lower-angle lifts and avoid forcing the stretch until their flexibility improves.
- Immediate sharp pain, numbness, or swelling indicates injury or strain, requiring stopping the stretch and consulting a healthcare professional.
- Perform this stretch three to five times weekly, holding for 20 to 30 seconds per side, and pair it with strength exercises to prevent strains.
Table of Contents
- How Do You Do a Hamstring Stretch With a Strap?
- Which Strap or Substitute Should You Use?
- What If You’re a Beginner or Have Back Pain?
- Tight Hamstring or Strain? Know the Difference
- When Should You Do This Stretch, and How Often?
- Why This Stretch Deserves a Spot in Every Routine
- Get a Strap Built for This Exact Stretch
- Sources
How Do You Do a Hamstring Stretch With a Strap?
The setup takes ten seconds, but the details separate a productive stretch from one that just yanks on your lower back. Lie flat on your back on a mat, both legs extended. Loop the strap around the ball or arch of one foot, holding one end in each hand.
Keep the opposite leg grounded and slightly active, foot flexed or resting flat, so your pelvis doesn’t tip. From there:
- Lift the working leg with a bent knee, keeping the strap snug but not gripped like a tug-of-war rope.
- Straighten the knee slowly until you feel a stretch through the back of the thigh, not a burn or pinch behind the knee.
- Flex your foot and toes toward your nose to add a calf and hamstring stretch together.
- Hold for a short, comfortable duration, breathing steadily rather than holding your breath.
- Lower with control and switch sides, repeating for 2 to 4 reps per leg.
Inhale to settle into position, then exhale as you draw the leg slightly closer or straighten the knee further. This isn’t a stretch you force on one big pull. The supine hamstring stretch is recommended by physical therapists specifically because lying down stabilizes the pelvis and cuts out the compensatory arching that happens when you try this standing.
Pro Tip: If your hands cramp holding the strap ends, walk your hands up the strap an inch at a time as your hamstring warms up. This deepens the stretch gradually instead of yanking your leg into a steeper angle all at once.
Keep your shoulders and head resting on the mat throughout. The moment your hips lift off the floor or your lower back rounds, you’ve gone past your current range.
Which Strap or Substitute Should You Use?
A dedicated yoga strap is the most reliable tool here, but it’s not the only option. Here’s how the common choices compare:
- Webbed yoga strap with a D-ring: non-stretch, adjustable length, and the buckle lets you lock in a loop instead of holding two loose ends the whole time.
- Resistance band: works in a pinch, but the elastic give makes it harder to hold a precise angle, and it can slip.
- Towel or belt: fine for an occasional stretch at home, though the lack of length markers makes consistent progress tracking harder.
For most people, a strap around 6 feet long in non-stretch cotton or nylon webbing gives enough slack to loop under the foot and still leave room to walk your hands up as flexibility improves. If your hands are cramping or the fabric digs in, pad your palms slightly or shift to a D-ring loop so you’re gripping webbing rather than a knot. Using a strap correctly means treating it as an extension of your arms, not a winch. Yune Yoga carries eco-conscious webbing straps built for exactly this kind of consistent, controlled stretching, covered in more detail further down.
What If You’re a Beginner or Have Back Pain?
Not everyone should start with a fully straightened leg, and that’s fine. The stretch scales up or down depending on where your body is today.
- Bent-knee partial extension: keep the knee bent at roughly 90 degrees and only straighten it partway. This is the right starting point if you’re recovering from an injury or have never stretched this way before.
- Lower-angle lift: bring the leg up to 45 degrees or lower instead of aiming straight up. Less hip flexion means less lower-back involvement, which helps if you have a sensitive spine.
- Advanced walk-up: once the basic hold feels easy, walk your hands progressively up the strap during the hold to increase hip flexion without changing your setup.
- Active primer: press the leg gently against light band tension and release, a few times before your static hold, to warm up the muscle first.
If you’re dealing with a recent hamstring injury, sciatica, or a flare of low-back pain, get clearance from a physical therapist or doctor before adding this to your routine. Yune Yoga’s guide to yoga for injury rehab covers how to sequence gentle mobility work around an existing injury.
Tight Hamstring or Strain? Know the Difference
A tight hamstring feels like a dull, steady pull, the kind that eases slightly as you hold the position. A strain feels sharp, sudden, or electric, often appearing during or right after activity rather than during a slow static hold. Clinical guidance on hamstring injuries draws this exact line: sharp pain during a stretch is your body telling you to back off, not push through.
Stop immediately and check in with a clinician if you notice:
- Sharp, stabbing pain rather than a stretch sensation
- Numbness or tingling down the leg
- Sudden swelling or bruising in the back of the thigh
Two mistakes show up constantly with this stretch, even among people who’ve done it for years. The first is rounding the upper back to try to get the leg closer to vertical, which quietly shifts the stretch out of the hamstring and into the lower back. The second is lifting the head to peek at the leg, which tightens the neck and pulls the spine out of neutral. Ground your shoulders, keep your head heavy on the mat, and let the strap do the reaching instead of your torso.
When Should You Do This Stretch, and How Often?
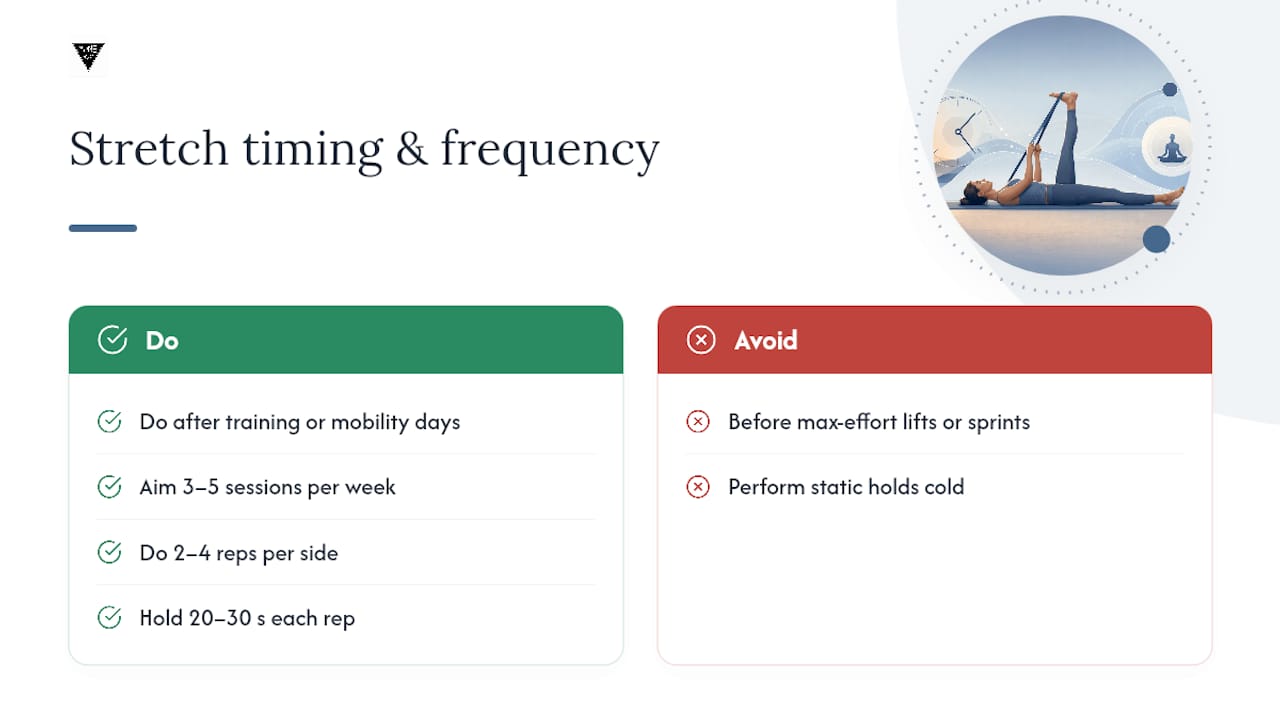
Save static strap stretches for after training or on separate mobility days rather than right before a max-effort lift or sprint session, since static holds performed cold or pre-performance can temporarily dull power output. Aim for 3 to 5 sessions a week, 2 to 4 reps per side, 20 to 30 seconds per hold.
A simple four-week ramp looks like this:
A simple four-week ramp involves gradually increasing stretch duration and repetitions as comfort and flexibility improve.
Pair this with light eccentric hamstring work, like slow Romanian deadlifts or leg curls, since flexibility without strength is a common setup for repeat strains.
Why This Stretch Deserves a Spot in Every Routine
Most flexibility advice treats stretching as an afterthought, something to squeeze in if there’s time left after the “real” workout. That’s backwards for the hamstrings specifically. This is one of the few muscle groups where a floor-based, strap-assisted stretch outperforms the standing version most people default to, simply because gravity and balance stop interfering with form.
What gets underestimated is how much technique matters more than range of motion. Someone who holds a modest 45 degree lift with a flat back and relaxed shoulders is doing more for their hamstrings than someone cranking their leg to 90 degrees while their lower back rounds off the mat. The strap is a tool for control, not a lever for forcing depth. Progress here is measured in weeks of small increments, not a single aggressive session.
The other overlooked piece is pairing stretching with strengthening. A flexible hamstring that’s never been loaded eccentrically is still a strain waiting to happen. Treat this stretch as one half of a routine, not the whole thing.
— Nicholas
Get a Strap Built for This Exact Stretch
A strap that stretches or slips undoes half the benefit of this exercise, so the material and buckle matter more than most people assume. Yune Yoga’s straps are built from durable, non-stretch webbing with a secure D-ring buckle, sized to give you enough length to loop under the foot with room to walk your hands up as you progress, without the give of a resistance band or the bulk of a rolled towel.
Before buying any strap, check three things: length (6 feet gives the most versatility), buckle type (a D-ring holds position better than a slide clasp), and material (cotton or nylon webbing outlasts elastic-blend straps). Yune Yoga’s straps are made from sustainable materials designed to hold up through daily use without stretching out over time. If you’re ready to build a consistent stretching routine, browse Yune Yoga’s strap collection and get a prop that matches the technique instead of fighting it.
Sources
- Physical therapy guidance on mobility and safe stretching (PMC535525)
- Stretching straps: tips for use, exercises, and more