Find Which Side of Your Yoga Mat Is Up in 20 Seconds With 2 Tests
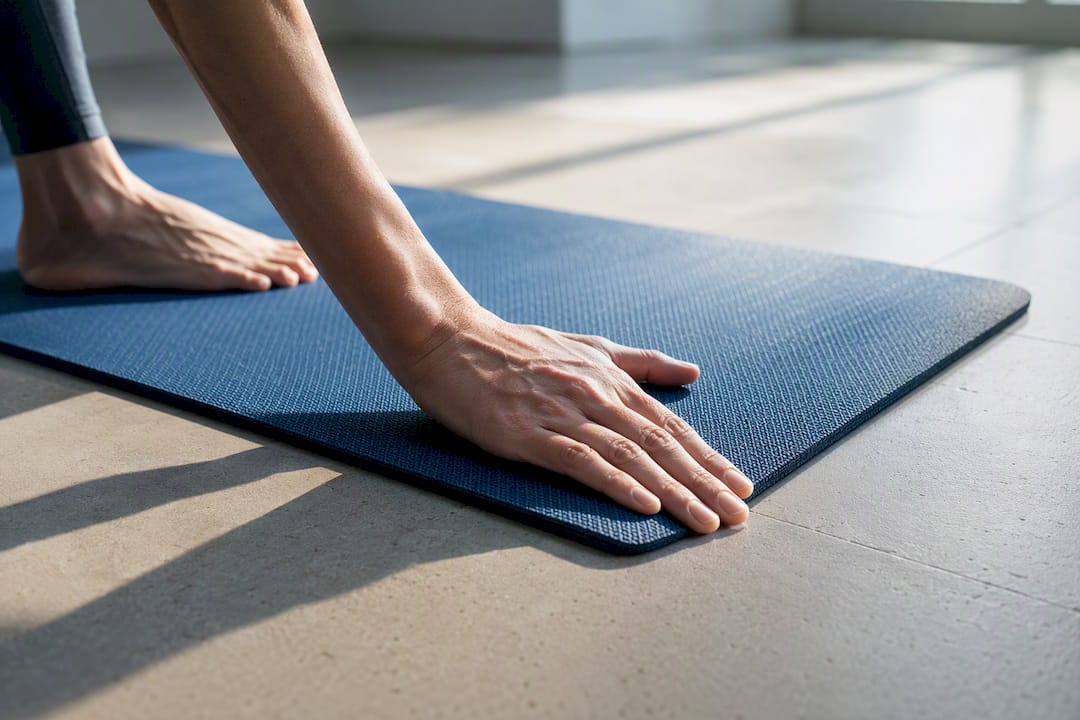
The practice side (the one your hands and feet touch) faces up. The base side, textured to anchor against the floor, faces down. Most mats mark the practice side with a logo or alignment lines, but a few materials, like polyurethane and cork tops, flip that logic and put a smooth, sweat-grabbing surface on top instead. When you’re not sure, two 10-second tests settle it faster than reading the packaging.
TL;DR:
- The floor-slide test indicates the correct side by showing which surface resists sliding on your specific practice floor.
- The palm-and-foot traction test reveals whether the practice surface grips your skin, especially when moisture activates the material’s tackiness.
- Moisture-activated surfaces like cork, polyurethane, and microfiber require damp tests for accurate orientation, unlike PVC or TPE mats.
- Reversible or double-sided mats may function equally well on both sides, eliminating the need to flip for specific grip reasons.
- Persistent slipping after testing and cleaning suggests the mat’s grip has worn out and may need replacement or specialized care.
Table of Contents
- Which Side of a Yoga Mat Is Up? Two Tests That Settle It
- What Your Mat’s Material Tells You About Top and Bottom
- Logos, Alignment Lines, and Roll Curl: Reading the Visual Clues
- When “Textured Side Up” Doesn’t Apply
- My Mat Still Slips. Now What?
- A Simple Checklist Before Your Next Class
- Trust the Test on Your Own Floor
- Solving Grip Problems With the Right Mat Setup
- Sources
Which Side of a Yoga Mat Is Up? Two Tests That Settle It
Guessing wastes time you could spend actually practicing. Two quick physical checks tell you which side of the yoga mat belongs up, and neither takes longer than tying your shoe.
1. The floor-slide test. Lay the mat flat on the actual surface you’ll practice on, whether that’s a hardwood studio floor, a tile living room, or a rubber gym mat. Place your palm flat on top and push sideways with light, steady pressure. Then flip the mat over and repeat the exact same push. The side that stays put, resisting your push instead of sliding, is the side that should face the floor. This works because a short floor-slide comparison reveals which surface actually bites into your specific floor, and that varies by material more than people expect. A mat that grips beautifully on carpet can slide on polished wood.
2. The palm-and-foot traction test. Set the mat down with your current guess as to which side is up. Get into a modified Downward Dog, or just press one palm flat and twist it gently, the way your hand moves when you shift weight in Plank. You’re checking for two things: does your palm stick without excess sliding, and does the mat itself stay anchored to the floor beneath it. If your hand slides but the mat holds its ground, you likely have the orientation backward.
Run both tests together rather than trusting either alone. The floor-slide test tells you about the base side’s grip on your specific flooring; the palm test tells you about the practice side’s grip on your skin. A mat can pass one and fail the other if you’ve got it flipped, which is exactly the scenario these two tests are built to catch. Combining visual cues with both hands-on checks, rather than leaning on a single signal, is the approach most grip-testing guides recommend, and it’s the one that actually holds up across different mat types.
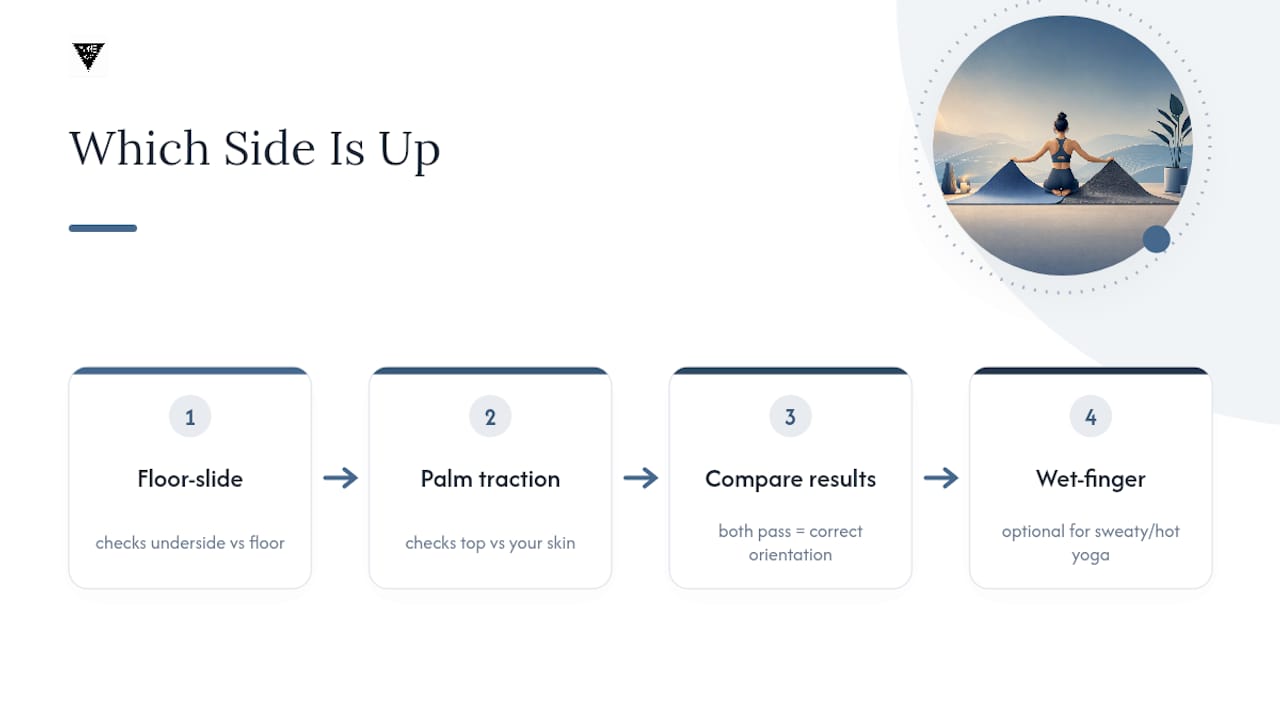
If you practice hot yoga or just sweat heavily, run a damp-fingertip variation before class. Wet two fingers, press them onto the surface you believe is the top, and twist slightly. Cork and polyurethane tops often grip better wet than dry, which means a dry-hand test alone can give you a false negative and send you second-guessing a perfectly good mat.
Pro Tip: Test on the actual floor you’ll practice on, not your kitchen tile if your studio has cork flooring. Underside grip is floor-dependent, and a mat that anchors on one surface can slide on another.
What Your Mat’s Material Tells You About Top and Bottom
Material construction changes the rules, and knowing your mat’s build saves you from misreading a perfectly normal design as a defect.
- PVC, TPE, and NBR mats: these typically have a finer, tackier texture on the practice side and a more pronounced waffle or dimpled pattern on the underside. The dimples exist specifically to grip flooring, so if you see a raised grid pattern, that side almost always goes down.
- Natural rubber with a polyurethane top: this construction is common in premium mats, and it inverts the “textured side up” assumption people bring from cheaper mats. The PU layer feels smooth, almost slick, when dry, but it’s designed to grip better once it absorbs sweat, which is why the smooth-looking side is still the correct practice surface.
- Cork-topped mats: cork behaves similarly to PU. Dry, it can feel a little slippery underfoot. Add moisture from your hands or feet, and the cork’s natural texture activates and grips noticeably better. Don’t judge a cork mat’s orientation with dry palms alone.
- Microfiber-topped mats: these are usually bonded to a rubber base, and the microfiber layer is the practice side by design. Like cork and PU, microfiber’s real grip only shows up once it’s damp, so a bone-dry test can undersell it.
- Reversible and closed-cell mats: some mats are built so both sides perform similarly, which is worth checking before you assume you’ve got it wrong.
The pattern across nearly every exception is moisture. Dry-hand testing works fine for standard PVC or TPE mats, but for cork, PU, and microfiber tops, you need the damp-fingertip check described above, or you’ll misjudge a mat that’s actually working exactly as intended. Understanding what gives a mat its stickiness in the first place helps explain why the same surface can feel completely different bone dry versus five minutes into a heated flow.
Logos, Alignment Lines, and Roll Curl: Reading the Visual Clues
When you don’t have time for a full test, a quick look at the mat’s design usually points you the right way.
- Logos and alignment markers are almost always printed on the practice side, since manufacturers use branding placement as a consistent visual guide for photography, classes, and quick identification.
- Care tags and packaging sometimes state orientation directly. It’s easy to toss the tag or ignore the insert card, but it’s worth a glance before you assume.
- Roll direction and cut-edge curl can also hint at intended orientation. Mats rolled the way the manufacturer intended often develop a subtle outward curl on the practice side over time, a small tell if you’ve lost track of which way is up.
- When visual clues and physical tests disagree, trust the tests. A logo tells you what the manufacturer intended in general; the floor-slide and palm tests tell you what’s actually happening on your floor, with your skin, today.
When “Textured Side Up” Doesn’t Apply
Some mats break the standard rule entirely, and it’s worth knowing which ones before you assume something’s wrong with yours.
- Reversible mats are built so both surfaces work for practice. If your mat performs similarly in the palm test and the floor-slide test no matter which way you flip it, it’s likely a reversible design, and either orientation is fine.
- PU-coated, sweat-activated tops look smooth and unremarkable dry, but they’re engineered to grip once damp. If your mat has this coating, ignore the instinct to flip it just because the surface looks slick.
- Closed-cell foam designs sometimes let you pick orientation based on preference rather than function, since both faces perform closely enough that aesthetics or feel become the deciding factor.
- Practice type matters, too. A hot yoga class where you’ll sweat heavily favors a moisture-activated top like PU or cork. A gentle restorative flow on a cool studio floor puts less demand on that same feature, so a standard tacky PVC or TPE surface works just as well.
My Mat Still Slips. Now What?
A mat that fails both tests even with correct orientation usually has a grip problem, not an orientation problem, and the fix is almost always cleaning, covering, or replacing.
- Clean it properly, and check the manufacturer’s care instructions first. Body oils, lotion residue, and embedded dirt are common causes of lost tack, and a proper cleaning routine restores grip in most cases without needing a new mat. Different materials tolerate different cleaners, so skipping the manufacturer’s sheet risks damaging the surface you’re trying to save.
- Add a microfiber towel or anti-slip underlayer for sweaty sessions. If you consistently practice hot yoga or run hot yourself, a towel designed for yoga use absorbs moisture at the surface instead of letting it pool and turn slick.
- Use manufacturer-approved sticky spray, and avoid roughening the surface yourself. Sandpaper or DIY texturing tricks can permanently damage a mat’s intended grip layer. Stick to products the manufacturer explicitly recommends.
- Know when it’s time to replace the mat. Visible wear, shiny or smooth patches where texture used to be, and a persistent loss of tack even after cleaning are all signs the mat has reached the end of its useful grip life.
Pro Tip: If you’re not sure whether it’s a dirty mat or a dying mat, run the palm test right after a thorough clean and let it dry fully. If grip doesn’t come back, the material itself has worn out, not just gotten dirty.
For more on restoring grip before you give up on a mat entirely, Yune Yoga’s guide to slippery mats walks through the same cleaning and towel strategies in more depth.
A Simple Checklist Before Your Next Class
Confirming orientation doesn’t need to be complicated once you’ve internalized the sequence. Here’s the short version worth keeping in your gym bag mentally.
- Look first. Check for a logo, alignment lines, or a care tag that states orientation outright.
- Palm test second. Press and twist on the side you think is up; you’re feeling for hand traction, not floor grip.
- Floor-slide test third. Push the mat sideways on your actual practice surface, then flip and repeat.
- Clean if needed. If both tests feel weak no matter the orientation, the issue is likely residue or wear, not which side is up.
If you regularly practice in conditions that punish weak grip, hot studios, sweaty flows, hardwood floors, it’s worth building your kit around materials suited to that environment from the start. A non-slip mat built for your practice style solves a problem before it starts, rather than troubleshooting it mid-class.
Trust the Test on Your Own Floor
Here’s the practical default: place the tackier, logo-marked side up, and if your mat is one of the PU or cork exceptions, run the damp-fingertip check before assuming the smooth side is wrong. That single habit, testing before assuming, prevents almost every slip-related frustration people blame on the mat itself. What surprises people most is how much floor material changes the outcome. A mat that grips perfectly at your studio can behave differently on your bedroom carpet or a friend’s hardwood, so retest when your practice location changes rather than trusting a result from three months and two floors ago. If you’re curious about extending that grip further, Yune Yoga’s guides on mat care and non-slip accessories cover the maintenance side once orientation is no longer the mystery.
— Nicholas
Solving Grip Problems With the Right Mat Setup
If you’ve run both tests and your mat still can’t hold its own against a sweaty flow or a slick studio floor, the fix often isn’t more troubleshooting, it’s better equipment. Yune Yoga builds its mats around the same principle covered above: a practice surface that grips your hands and feet, paired with a base layer that actually anchors to the floor.
Cork-topped mats activate their grip as they absorb moisture, which suits hot yoga and heavy sweaters without needing a towel layered on top. For mats built on natural rubber, the rubber base itself does the floor-anchoring work rather than relying on patterned surfaces. And if you’re pairing an existing mat with a microfiber towel for sweaty sessions, that’s covered too. Many products lean on sustainable materials rather than synthetic foams that break down and lose tack within a season. Browse the full mat and accessory lineup to find a setup that matches how and where you actually practice.
Sources
- Which Side of a Yoga Mat to Use: How to Tell Fast
- Which Side of a Yoga Mat Is Up? Use This 10-Second Test
- Which Side Of A Yoga Mat Goes Up? - Complete Guide - ExercisePick


%20faces%20up.%20The%20base%20side,%20textured%20to%20anchor%20against%20the%20floor,%20faces%20down.%20Most%20mats%20mark%20the%20practice%20side%20with%20a%20logo%20or%20alignment%20lines,%20b...)