Loop a Yoga Strap in 6 Studio Tested Steps with Fingertip Checks
The most reliable loop starts by feeding one end of the strap through its rings, doubling it back on itself, and pulling the tail taut until the loop stays fixed at the size you set. If your strap has no rings, a simple overhand knot does the same job. This single-loop method works for most stretches and poses, but the strap should always adjust to your range, never pull you past it.
TL;DR:
- Using a looped strap relies on threading through rings or tying an overhand knot; doubling back through rings increases friction and prevents slipping.
- A 6-foot strap is suitable for most practitioners, while 8 to 10 feet is better for taller individuals or deep supine stretches.
- Cotton or webbing straps hold their shape better and grip more reliably than elastic or scrunchie-style straps, especially when adjusting under tension.
- Proper setup involves testing the loop under light pull to ensure stability, and care to avoid pushing past comfortable range to prevent injury.
- Regular maintenance includes hand washing, air drying, and inspecting rings for rust or wear to prolong strap lifespan and safety.
Table of Contents
- How to make a secure loop step by step
- Loop variations for the foot, arm, thigh, and mat
- Safety and alignment cues to watch for
- Choosing the right strap length and hardware
- Quick pose examples using a looped strap
- Where to learn more about strap technique
- Maintenance and care for your yoga strap
- Step by step for each loop variation
- Bringing looped straps into your regular practice
- What to look for in strap material and width
- A personal note on practicing with straps
- A simple checklist before you buy a strap
- Sources
- FAQ
How to make a secure loop step by step
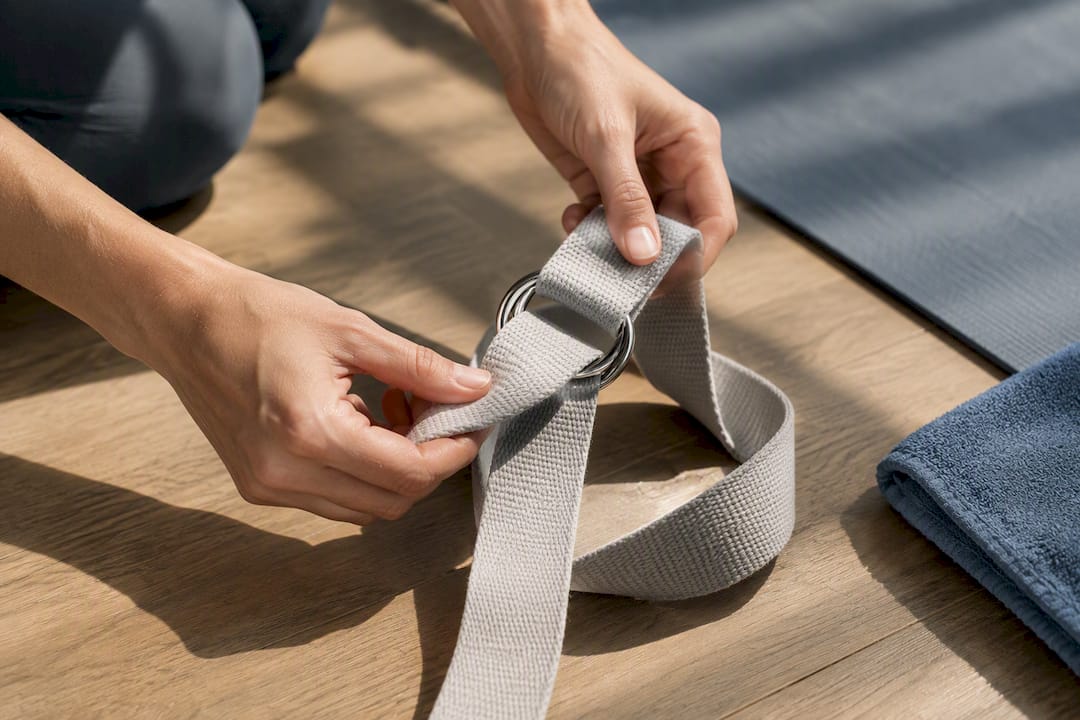
Before you loop anything, know the three parts of a strap you’re working with: the free end (the tail you pull through), the midpoint (where the loop closes around your foot, arm, or thigh), and the rings or buckle (the metal or plastic hardware near one end that locks the loop in place). Some straps, particularly cotton webbing styles, use two D-rings; others use a single slide buckle. Both work the same way in principle: thread, double back, tension.
- Hold the strap with the rings in one hand and the tail in the other, leaving enough slack to fit around your foot, thigh, or the body part you’re using.
- Feed the tail through both rings from front to back.
- Pull the tail back through in the opposite direction, so it doubles over itself and locks against the rings.
- Slide your foot, arm, or thigh into the loop and pull the tail until the loop sits snug, not tight.
- Test the hold before committing to the pose. Press outward with your foot or arm the way you would during the stretch, and check the loop doesn’t slip or grow.
- Reposition the rings if they land somewhere uncomfortable, like the arch of your foot or the crease of your elbow.
If your strap has no rings, tie a simple overhand knot to form a fixed loop, then adjust the loop’s circumference before you tighten the knot fully. This won’t be as easy to resize mid-pose as a ring-based strap, so measure generously the first time.
Mid-strap slippage is almost always caused by one of two things: the loop wasn’t doubled back far enough through the rings, or the strap material is too slick to hold friction. Cotton and jute webbing grip better than smooth nylon. If your strap keeps loosening, try re-threading it through the rings a second time before you tighten, which adds friction and holds the loop size more consistently.
Pro Tip: Do a fingertip tension check first: press your finger into the loop and mimic the pull of the pose. If the loop shifts under light pressure, it will definitely shift under a hamstring or shoulder stretch.
Loop variations for the foot, arm, thigh, and mat
Once you’ve got the baseline loop down, the placement and length of the loop change depending on the pose. A Yoga Journal breakdown of common strap uses covers several of these setups in more detail, but here’s the quick version.
- Foot loop: Place the loop across the ball of the foot, not the toes, for supine hamstring stretches. This gives you leverage without curling your toes to hold on.
- Arm loop: Set the loop just above the elbow crease or around the upper arm for shoulder and chest openers, and for arm-balance prep where you need the elbows tracking in one line.
- Thigh loop: Wrap the loop around both thighs, just above the knees, to hold hip-distance apart in Chair Pose or to keep the knees from splaying in Bridge.
- Mat loop: Fold your mat, wrap the strap around it twice, and clip or tie it off. This creates a hands-free carry strap for transport.
- Wrap count: Use a single wrap for quick adjustments and a lighter hold, and a double wrap when you need more grip or a shorter working length, such as gripping a foot loop with less slack.
Safety and alignment cues to watch for
A strap is there to extend your reach, not to force your body past where it wants to go. If you feel sharp pain, a pinch, or a burning sensation anywhere, back off the tension immediately. Harvard Health’s guidance on stretching for back pain recommends progressive, cautious stretching and warns against forcing range, a principle that applies directly to strap work.
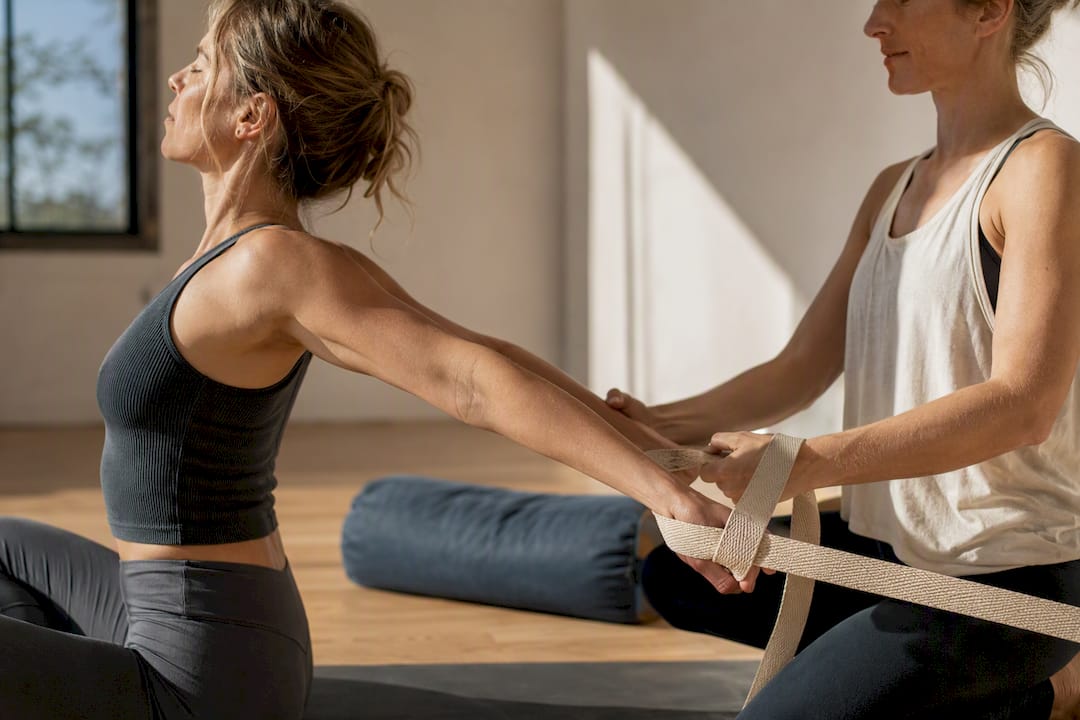
For shoulder openers, keep your shoulder blades drawn down and supported rather than letting them ride up toward your ears. An arm loop set at the elbow, rather than the wrist, helps prevent the shoulder blades from winging out. If you’re using a strap near the head or neck, such as in a supported fish pose or gentle backbend, avoid pushing into extreme neck extension. The strap should support the position, not pull your head back.
Progressive loading matters here too: increase tension and range in small increments across sessions rather than chasing depth in a single sitting.
Statistic Callout: ACE’s expert guidance on stretching explains that a yoga strap works as a mechanical extension of the arms, static and non-elastic, unlike a resistance band, which builds tension as it stretches. Knowing this distinction matters because a strap will never “give” the way a band does; if it feels too tight, the fix is to loosen the loop, not to push through it.
Pro Tip: If you feel instability rather than a stretch sensation, such as shaking, pinching, or numbness, stop and check in with a teacher or a medical professional before continuing.

Choosing the right strap length and hardware
The length and hardware of your strap change how well a loop holds and how much range you can work with. OnePeloton’s strap guide notes that a 6-foot strap works as a practical baseline for most people, giving enough length for arm and leg stretches while leaving slack to loop through the rings. Taller practitioners, or anyone doing extended supine leg work, may prefer an 8 to 10 foot strap for extra reach.
- Length: Choose 6 feet for general practice, and 8 to 10 feet if you’re tall or working deep supine stretches.
- Material: Cotton or polyester webbing holds a loop shape with very little stretch, while scrunchie-style or elastic mat straps give more grip but less precision when you need a fixed loop size.
- Rings: D-rings are the most common and grip reliably once threaded twice; square rings work similarly but sit flatter against the body; slide buckles skip the threading step entirely and adjust with one motion.
- Care: Wipe down straps after sweaty sessions and let them air dry fully, since trapped moisture can weaken stitching and make rings slip more easily over time.
Quick pose examples using a looped strap
- Supine hamstring stretch: Loop the strap across the ball of one foot while lying on your back, extend the leg toward the ceiling, and you should feel a stretch through the back of the thigh, not the knee.
- Bound angle or supported reclined pose: Use a large loop around your lower back and the soles of your feet to hold a gentle bound angle without gripping with your hands.
- Arm and shoulder opener: Set an arm loop just above the elbows behind your back to open the chest gradually, easing into it rather than snapping the shoulders back.
- Thigh loop in Chair or Bridge: Wrap the loop above the knees to cue hip-distance apart and encourage the thighs to rotate outward slightly.
- Passive support, not a substitute: Straps are best used for passive holds and alignment cues. They don’t replace controlled mobility work, so keep some sessions strap-free to build active range too. Try the setups from Yune Yoga’s guide to strap exercises if you want a fuller routine.
Where to learn more about strap technique
Yune Yoga’s blog covers strap use in more depth, including a full walkthrough on how to use yoga straps to improve your practice and a breakdown of the benefits of using yoga straps for readers who want the reasoning behind each cue. Nicholas, who writes for the blog, has spent years working with straps in his own practice and draws on that hands-on experience for these guides.
Yune Yoga also sells straps built from durable, sustainable materials designed to hold a loop without slipping, alongside mats, towels, and other accessories in its collection. If you try the linked routines, notice how the loop feels different depending on the pose, and adjust from there.
Maintenance and care for your yoga strap
A strap that’s cared for properly will hold its loop shape and grip for years. Rinse cotton or webbing straps by hand with mild soap if they pick up sweat or oil, and skip the washing machine, since agitation can fray stitching near the rings. Always air dry flat rather than wringing or hanging by one end, which can stretch the material unevenly and change how tightly it loops.
Check the rings periodically for rust or roughness, especially on metal D-rings, since a corroded ring grips less reliably and can snag the fabric. Store your strap loosely coiled rather than knotted tight, so it doesn’t develop a permanent crease that makes future loops sit unevenly. If you notice the fabric thinning near the rings, that’s usually the first sign of wear, and it’s worth retiring the strap before the stitching gives out mid-pose.

Elastic or scrunchie-style mat straps need slightly different care: keep them away from direct heat, since elastic fibers break down faster under sun or dryer heat than woven cotton does. A strap that’s stretched out and won’t hold a snug loop anymore has reached the end of its useful life, and no amount of re-threading will restore the original grip.
Step by step for each loop variation
The foot loop starts the same way as the baseline method: thread the tail through the rings, double it back, then widen the loop enough to slide your foot in before tightening. For the arm loop, set the loop size first around your forearm, then slide it up to the elbow crease before cinching, since threading it directly at the elbow is harder to judge.
The thigh loop needs more circumference than either of those, so measure around both thighs together before you double the tail back through the rings. Once it’s on, adjust by pulling the tail rather than repositioning the whole loop, which keeps the placement even on both legs.
The mat loop skips rings entirely in most cases. Fold your mat in thirds, wrap the strap around the middle twice, and tie the ends in a simple overhand knot rather than threading rings, since the goal here is a stable carry handle, not an adjustable fit. For all four variations, the tension test is the same: apply the load you’d expect from the pose before you commit your full weight or reach to it.
Bringing looped straps into your regular practice
The easiest way to fold strap work into a routine is to keep one within reach during floor stretches and let it replace your hands wherever your reach falls short. In supine hamstring work, that means grabbing the strap instead of straining to hook your fingers around your foot. In seated forward folds, hooking the strap around the balls of both feet lets you lengthen the spine without rounding the lower back to compensate for tight hamstrings.
Standing and balance poses benefit from straps differently. A thigh loop in Chair Pose gives you a physical cue to keep the knees tracking over the ankles instead of collapsing inward, and that same cue transfers to Bridge Pose when you’re trying to keep the knees from splaying under load.
For shoulder work, the strap becomes a spacer rather than a puller. Holding a loop wider than shoulder width during a supported backbend or shoulder opener keeps the tension gentle and even, rather than yanking the arms into a position they’re not ready for. Over several weeks of practice, most people find they need less loop length to reach the same stretch, which is a fair way to track your own progress without any other measurement.
What to look for in strap material and width
Width affects comfort more than most people expect. A narrow strap, under an inch and a half, can dig into skin during a foot or thigh loop, especially under real tension. Wider straps, closer to two inches, spread that pressure out and feel less like a cinch and more like a support.
Material changes how the loop behaves once it’s set. Cotton and polyester webbing hold their shape with almost no stretch, so a loop you tie at the start of a stretch stays the same size throughout, which matters for poses where you’re relying on a fixed reference point. Scrunchie-style or looped elastic straps give a bit more forgiveness and often grip skin better, which some practitioners prefer for foot loops where slipping is more likely.
If you’re choosing a strap mainly for looping rather than general stretching, prioritize a webbing style with sturdy rings over a stretchier alternative. The ACE guidance on stretching draws a clear line between static straps, which hold a fixed loop, and elastic resistance bands, which are built to stretch under load, and that distinction should guide your choice depending on whether you want a stable hold or some give.
A personal note on practicing with straps
I remember my first attempt at a strap loop landing me with a foot that kept sliding free mid-stretch, which taught me to test the loop before trusting it. Straps work best when you treat them as a support for your breath and control, not a shortcut to a deeper stretch. If you want more structured practice with one, the strap exercises on our blog are a good place to start.
— Nicholas
A simple checklist before you buy a strap
If you’re shopping for a strap that loops cleanly and holds its shape, a few features matter more than the rest. Look for sturdy rings, a length that matches your height and goals, and a material that won’t stretch out after a few months of regular use. Straps built from durable, sustainable materials designed to hold a secure loop without slipping can be a solid fit if you’re ready to add one to your practice.
- Length: 6 feet for most practitioners, 8 to 10 feet for taller bodies or extended stretches.
- Rings: D-rings or a slide buckle, both reliable once threaded correctly.
- Material: Cotton or webbing for a fixed, non-slip loop.
| Feature | What to look for |
|---|---|
| Length | 6 feet baseline, 8 to 10 feet for taller users |
| Rings | D-rings or slide buckle |
| Material | Cotton or durable webbing |
Browse the full strap and accessories collection or shop the wider range at Yune Yoga to find one that fits your practice.
Sources
This article draws on guidance from Harvard Health, ACE, Yoga Journal, and OnePeloton for safety, technique, and length recommendations.
- New expert guidance on stretching: what belongs in your programs (ACE)
- Using yoga straps creatively (Yoga Journal)
- How To Use Your Yoga Strap (OnePeloton)
- Stretching and strengthening exercises to relieve and prevent lower-back pain (Harvard Health)
FAQ
How do I set a yoga strap for the first time?
Thread the tail through the rings, double it back on itself, and pull it snug before testing the hold with light pressure. Adjust the loop size by pulling the tail further through or loosening it slightly until it fits comfortably around your foot, arm, or thigh.
How do I use a yoga strap during a pose?
Slide the body part you’re stretching into the pre-made loop, then use the strap to extend your reach without pulling yourself past a comfortable range. Straps work best as a support for alignment, not a tool to force extra depth.
What is the difference between a yoga strap and a resistance band?
A yoga strap is a static, non-stretch tool that extends your reach and helps with alignment, while a resistance band is elastic and builds tension the further it stretches, according to ACE’s guidance on stretching. They serve different purposes: straps assist range and positioning, bands add resistance for strength work.
How do I keep an adjustable strap from slipping?
Thread the tail through the rings twice rather than once, which adds friction and holds the loop size steady under tension. Choose a strap with a textured material like cotton webbing, since smooth synthetic fabrics tend to loosen more easily during a stretch.