
Yoga mat exercises: A beginner-friendly guide to building a full-body workout at home
Key Takeaways
A yoga mat can support a surprisingly complete home workout when you combine strength, core control, mobility, and light cardio. Start simply, move with care, and build consistency before chasing intensity.
- Clear a safe space and position your mat on a stable surface.
- Warm up with breathing, mobility, and low-impact movement.
- Train the lower body, core, upper body, and cardiovascular system.
- Adjust repetitions, range of motion, and impact to suit your level.
- Progress gradually and take recovery days when your body needs them.
Choose the right setup for yoga mat exercises
A useful workout space does not need to look like a studio. You need enough room to extend your arms and legs, a mat that stays in place, and clothing that allows comfortable movement. With a few practical adjustments, yoga mat exercises can fit into a bedroom, living room, hotel room, or outdoor space.
How much space and equipment you need
Begin with a clear area roughly the length and width of your outstretched body. Remove nearby objects with sharp corners, check the ceiling clearance for overhead movement, and keep water within reach. A mat is enough for most exercises, while a towel, resistance band, or light pair of weights can add variety later.
A portable setup is especially helpful if your workout moves between home, work, and travel. Yune Yoga makes foldable travel mats, absorbent yoga towels, and durable yoga straps for people who want to practice in different locations without carrying bulky gear. For more ideas about building a comfortable practice space, browse this home yoga practice guide.
How to position your mat for stability
Place the mat on a dry, even surface and unroll it fully before you begin. If you are on carpet, test it with a few slow lunges and planks; a soft or slippery floor can make balance work frustrating. Keep the long edge aligned with the direction in which you will travel during lunges, bear crawls, or yoga flows.
Press your hands and feet into the mat rather than allowing them to drift toward the edges. If the corners curl, reverse-roll the mat briefly or place a safe, low-profile object outside the exercise area. Stability matters more than a perfect arrangement, so change locations if the surface continues to slide.
When to add resistance bands or weights
Bodyweight is sufficient while you are learning alignment and control. Add a light resistance band when an exercise feels easy but your form remains steady, or use small weights for movements such as rows and presses. The added load should make the final repetitions challenging without making you hold your breath or compensate with your back.
Try one new load at a time. A band around the thighs can increase the demand of bridges and squats, while light weights can make a controlled floor session more demanding. You can also follow a mat workout with minimal equipment when you want ideas that keep the setup simple.
How to modify exercises for your fitness level
Every movement has an easier and a harder version. Reduce the range of motion, slow the tempo, or use a wall for support when you are new; later, increase time under tension, add repetitions, or move through a larger range. Good form comes first because it gives you a clearer sense of what the exercise is actually asking from your body.
Use discomfort as information rather than a test of willpower. Muscle effort and mild fatigue are expected, but sharp pain, unusual joint pressure, or dizziness is a reason to stop and reassess. A chair, folded towel, or lowered knee position can make a session more accessible without making it less worthwhile.
Warm up your body before exercising on a mat
A warm-up gives your joints and muscles time to transition from stillness to movement. It can also reveal stiffness that needs more attention before you begin strength or cardio work. Keep the first few minutes easy, gradually increasing your breathing and body temperature rather than rushing into difficult positions.
Breathing drills to raise body awareness
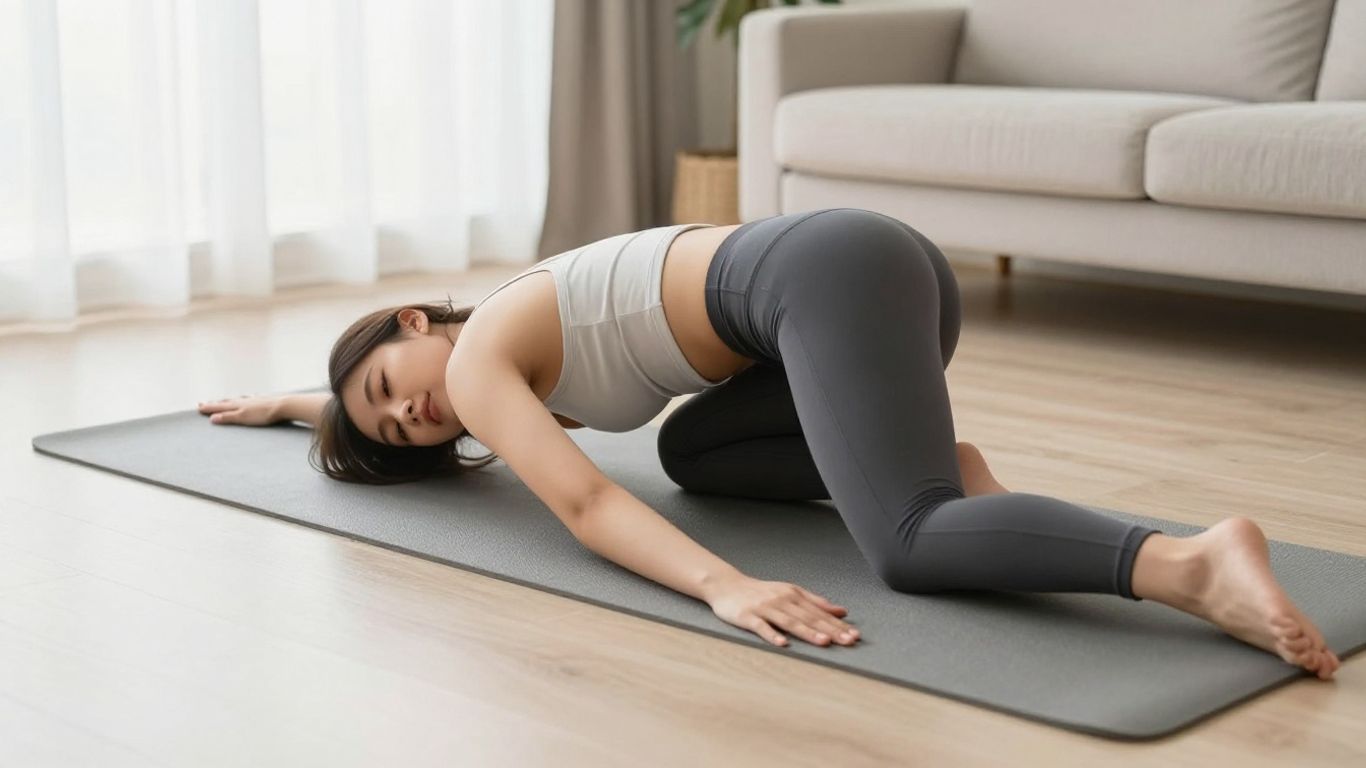
Lie on your back or sit comfortably with your shoulders relaxed. Breathe in through your nose if that feels natural, allow your ribs to expand, and exhale slowly without forcing the breath. Continue for five to eight cycles, noticing whether your jaw, hands, and stomach are unnecessarily tense.
Next, pair the breath with movement: inhale as you reach your arms overhead and exhale as you bring them down. This simple pattern helps you settle into a steady rhythm before the session becomes more demanding. Keep the breath smooth; it should support movement, not become another task to perfect.
Spinal mobility movements for the back
Come onto hands and knees with your hands beneath your shoulders and knees beneath your hips. Slowly alternate between lifting the chest and tailbone and rounding the spine, moving only as far as feels comfortable. Five to ten gentle repetitions are enough to begin.
You can also shift your hips back toward your heels and return to all fours, or rotate one arm toward the ceiling while keeping the knees grounded. Move slowly through these positions instead of forcing a stretch. The goal is to prepare the spine for motion, not to chase the deepest possible range.
Hip and shoulder openers
From hands and knees, step one foot forward beside the corresponding hand and rock gently toward it, then back. Switch sides after several repetitions. For the shoulders, make slow arm circles and reach one arm across the chest while keeping the shoulder relaxed.
A low lunge with the back knee supported by the mat can also prepare the hips for squats and lunges. If your knees feel sensitive, add a folded towel underneath them. Keep every opener controlled, especially when your muscles still feel cool.
A low-impact sequence to increase heart rate
Finish the warm-up with a short sequence of marching in place, step-backs, arm reaches, and slow bodyweight squats. Keep one foot on the floor at all times if jumping does not feel comfortable. The pace should be conversational, with enough effort to feel warmer but not so much that you are already tired.
Repeat the sequence for two or three minutes, changing direction or adding gentle knee lifts as your body allows. A beginner-friendly morning yoga sequence can also provide a calm way to connect mobility with a gradual increase in movement. You should finish ready to work, not in need of a second warm-up.
Build lower-body strength with mat exercises
Lower-body training on a mat can be both simple and demanding. The key is to use a controlled pace and pay attention to how your feet, knees, hips, and torso work together. Begin with exercises that let you practice alignment, then progress by adding repetitions, pauses, or single-leg variations.
Glute bridges for the hips and hamstrings
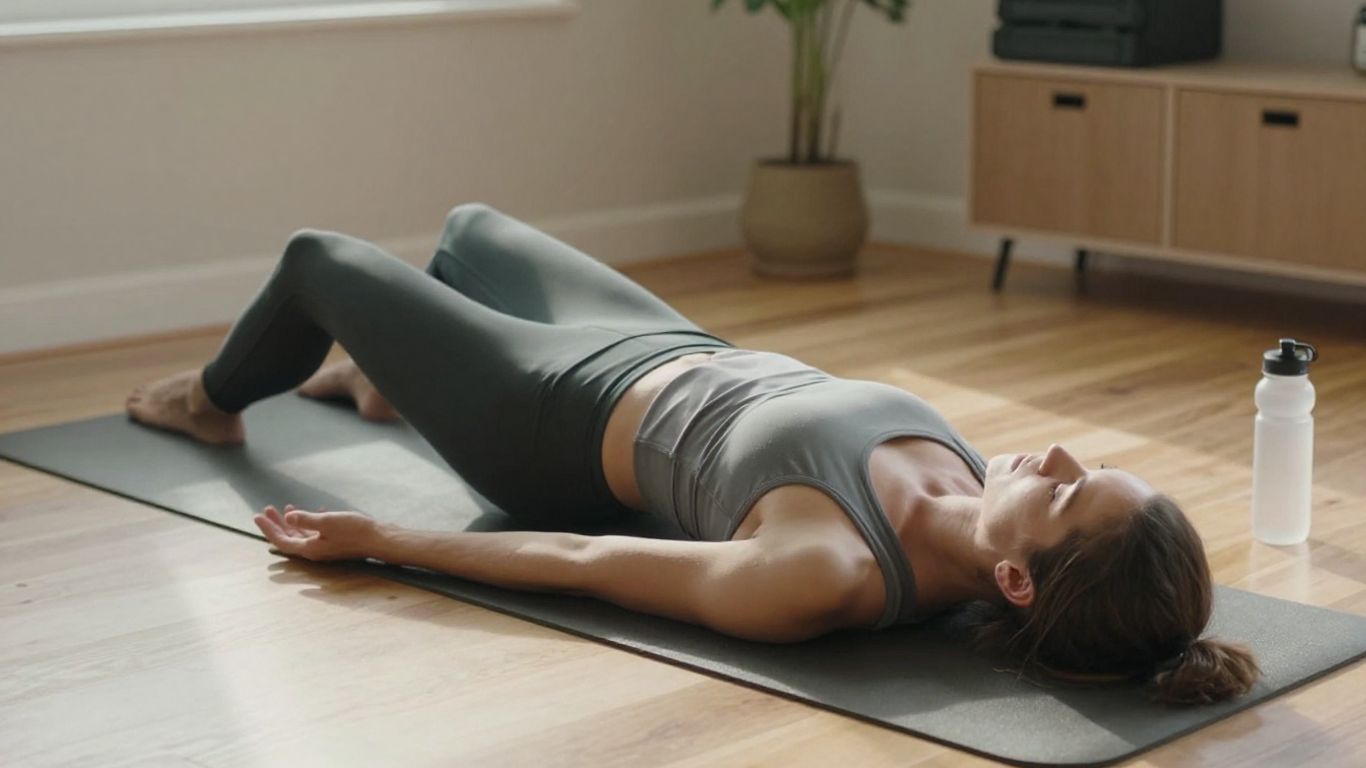
Lie on your back with your knees bent, feet about hip-width apart, and arms resting by your sides. Press through your feet to lift your hips until your body forms a comfortable diagonal from shoulders to knees. Pause briefly, squeeze the glutes gently, and lower with control.
Avoid pushing the ribs upward or arching the lower back to gain height. Eight to twelve repetitions are a reasonable starting point. To make the exercise harder, pause at the top for two breaths or place a light band above the knees while keeping the knees aligned with the toes.
Bodyweight squats for the legs
Stand with your feet around shoulder-width apart and toes turned out slightly if that feels natural. Send your hips back as you bend the knees, keeping your chest lifted without forcing it upright. Press through the whole foot to return to standing.
Use a chair behind you as a depth guide when learning the movement. Your knees do not need to reach a particular angle; stop where you can keep your feet grounded and your spine comfortable. Slow three-second descents can make a small set feel much more challenging.
Reverse lunges for balance and control
From standing, step one foot back and lower both knees toward the floor, keeping most of your weight over the front foot. Push through the front foot to return to standing, then switch sides. Reverse lunges often feel more manageable than stepping forward because you can control the distance more easily.
Hold a wall or chair if balance is a concern. Keep the front knee tracking in the same general direction as the toes and avoid dropping quickly into the bottom position. Start with six repetitions per side, resting before your balance becomes sloppy.
Donkey kicks and fire hydrants for the glutes
Return to hands and knees, brace your stomach gently, and lift one bent leg behind you for a donkey kick. Lower it without letting the hips twist. For a fire hydrant, lift the bent knee out to the side while keeping the shoulders level.
These exercises work best when the movement stays small and deliberate. Do not swing the leg for extra height. Try eight to twelve repetitions on one side, then rest your wrists and repeat on the other side.
Single-leg variations for progression
Single-leg work increases the balance and control demands without requiring heavy equipment. You might perform a bridge with one foot lifted, a supported single-leg squat to a chair, or a reverse lunge that pauses before returning to standing. Use a wall or fingertips for support rather than allowing wobbling to dictate the movement.
Progress only when you can keep your hips level and your knee stable. A useful lower-body sequence might pair bridges, squats, reverse lunges, and fire hydrants, with a short rest between exercises. This creates a complete session without making every move maximally difficult.
Train your core without gym equipment
Core training is more than repeated crunches. It includes resisting movement, controlling the pelvis, and coordinating the arms and legs while the trunk stays steady. On a mat, you can train those qualities with short sets and careful breathing rather than trying to hold exhausting positions.
Forearm and high planks
For a forearm plank, place your elbows beneath your shoulders and extend your legs behind you, or lower your knees to the mat. For a high plank, place your hands beneath your shoulders and create a long line from your head to your heels or knees. Keep your gaze slightly ahead of your hands.
Start with three holds of 15 to 30 seconds. Think about gently tightening the stomach and glutes without clenching every muscle. If your hips sag or lift sharply, end the hold and rest; a shorter, well-controlled plank is more useful than a longer one with lost alignment.
Dead bugs for controlled core stability
Lie on your back with your arms reaching toward the ceiling and your knees bent above your hips. Slowly extend one arm and the opposite leg toward the floor, then return to the starting position before switching sides. Keep the movement small enough that your lower back does not lift away from the mat.
Exhale as the arm and leg extend, then inhale as they return. Begin with five repetitions per side. If both limbs moving together is too difficult, move only the legs or tap one heel to the floor at a time.
Bird dogs for balance and coordination
From hands and knees, reach one arm forward while extending the opposite leg back. Pause briefly, keeping your pelvis facing the mat, then return both limbs under your body. Alternate sides slowly rather than trying to cover a large distance.
Imagine balancing a cup of water on your lower back. That image encourages steadiness without requiring complicated instructions. Six to eight repetitions per side can challenge coordination, especially when you hold the final position for a breath.
Bicycle crunches and toe taps
For bicycle crunches, lie on your back and bring one elbow toward the opposite knee while the other leg extends, then switch sides. Rotate from the ribs instead of pulling on the head. If the neck becomes tense, keep your head down and perform alternating heel taps instead.
Toe taps offer another approachable option. With the knees over the hips, lower one foot to tap the mat and bring it back before changing sides. Move slowly enough to keep the pelvis quiet. If you want a broader collection of bodyweight ideas, this bodyweight exercise guide offers another source of movement inspiration.
How to protect your lower back
Keep the ribs from flaring and avoid chasing a range of motion you cannot control. Pressing the lower back aggressively into the mat is not necessary for every exercise, but you should be able to maintain a comfortable, supported position. Stop if you feel pinching, sharp pain, or symptoms that travel into the legs.
The following small adjustments usually make core exercises more manageable:
- Bend the knees more deeply or keep them closer to the body.
- Reduce the distance your arms or legs travel.
- Place the hands beneath the pelvis for gentle support.
- Work for time instead of adding more repetitions.
After each adjustment, reassess your breathing and alignment. The right version is the one that lets you train the trunk steadily without turning the movement into a lower-back exercise.
Strengthen your upper body on the mat
The mat gives you a stable place to train the chest, shoulders, arms, and upper back. Since many upper-body exercises use the wrists and shoulders, take extra care with hand placement and tempo. You can make nearly every movement easier by lowering the knees or raising the hands onto a sturdy surface.
Push-ups and knee push-up modifications
Start in a high plank with your hands slightly wider than your shoulders. Bend your elbows on a diagonal as you lower your chest, then press the mat away to return. Keep the body moving as one unit rather than letting the hips drop first.
For a knee push-up, lower the knees while keeping a straight line from the knees through the hips and shoulders. You can also practice a slow lowering phase and return to the top from the knees. Begin with three to eight controlled repetitions, resting before the shoulders lose position.
Plank shoulder taps for stability
From a high plank, lift one hand and tap the opposite shoulder, then replace it before switching sides. Widening the feet can make the movement more stable, while lowering the knees reduces the load. Keep the hips as quiet as possible.
Move slowly and breathe through each tap. The aim is not to rush from side to side but to resist rotation through the trunk. If your wrists tire first, take a break or use a forearm-based core exercise instead.
Triceps dips with careful joint positioning
Sit near the front edge of a firm, low surface or work from the floor with your knees bent. Place your hands behind you, fingers generally facing forward or slightly outward, and bend the elbows only as far as feels comfortable. Press through the hands to return without locking the elbows aggressively.
Keep the shoulders away from the ears and avoid dropping deeply if your shoulders feel strained. Floor-based triceps work can be modified by keeping more weight in the feet. The movement should feel controlled, never like a stretch forced into the front of the shoulder.
Superman lifts for the upper back
Lie on your stomach with your arms extended forward or held beside your body. Lift the arms and upper chest a small amount while keeping the neck long, then lower slowly. You can lift one arm at a time if raising both creates tension in the lower back.
Think about reaching through the fingertips rather than lifting as high as possible. Six to ten repetitions are enough to practice upper-back engagement. Rest your forehead on a folded towel between sets if the neck feels uncomfortable.
How to progress when bodyweight exercises become easier
Progress can mean more than adding repetitions. Slow the lowering phase, pause near the hardest point, reduce rest slightly, or choose a more demanding variation. A light band or pair of weights can also help, but only after the bodyweight version feels stable.
Track one simple measure, such as total controlled repetitions or plank hold time. Increase it gradually and keep the rest of your workout steady for a week or two. This makes it easier to notice whether you are becoming stronger or merely accumulating fatigue.
Add cardio and mobility to your mat workout
A mat can support low-impact conditioning as well as strength work. Cardio movements raise the pace, while mobility sequences help you move through a broader range without turning the session into a competition. Alternate demanding intervals with easier movement so you can maintain control from beginning to end.
Mountain climbers for a higher-intensity option
Begin in a high plank and draw one knee toward the chest, then switch legs. You can move slowly for a strength-focused version or pick up the pace for a stronger cardiovascular challenge. Keep the shoulders over the hands and avoid bouncing the hips excessively.
If the wrists or shoulders need a break, step one foot forward at a time instead of running the legs. Work for 20 seconds, rest, and repeat once or twice. The quality of the plank position matters more than speed.
Bear crawls for full-body conditioning
Start on hands and knees, then lift the knees just slightly from the mat. Move the opposite hand and foot forward together, followed by the other side. Take small steps and keep the back relatively level as you travel forward, backward, or sideways.
If the lifted-knee position is too intense, keep the knees down and perform a slow tabletop crawl. Bear crawls demand coordination, so practice the pattern before adding distance. A clear area around the mat is especially useful here.
Skater steps for lateral movement
Step to one side and bring the opposite foot behind or beside you, then step across to the other side. Swing the arms naturally while keeping the knees soft. Begin with a walking rhythm, adding a small hop only if your joints tolerate it.
Stay light and controlled rather than reaching for the biggest step. Lateral movement can feel unfamiliar if most of your training is forward and backward. Five rounds of 20 to 30 seconds can add variety without dominating the workout.
Yoga flows for active recovery
Use a gentle flow when you want to keep moving while bringing the intensity down. Link child’s pose, hands-and-knees spinal movement, a low lunge, and a supported downward-facing position, pausing for a breath in each. Keep the transitions slow and skip any position that feels uncomfortable.
The Yune Yoga Blog includes practical topics for yoga enthusiasts, including mat choices, back-care discussions, and ways to build a sustainable practice. A flow can serve as a warm-up, a cooldown, or a recovery interval between strength circuits.
How to choose low-impact alternatives
Low-impact does not mean ineffective. Replace jumping with step-outs, running with marching, and deep lunges with shallow supported lunges. You can also reduce the work interval and increase the recovery period while keeping the same movement pattern.
Choose the version that lets you land softly, breathe regularly, and maintain alignment. If you are returning after a break or managing a sensitive joint, begin with the least demanding option and test how you feel later that day before increasing the load.
Create and progress through a complete mat workout
A complete routine does not need to be long. It needs a clear beginning, a balanced selection of movements, and enough recovery to keep your technique consistent. The sample formats below can be adjusted to your available time and current energy.
A 10-minute routine for beginners
Start with two minutes of marching, arm circles, and gentle spinal movement. Then complete one or two rounds of glute bridges, chair-supported squats, knee push-ups, dead bugs, and step-outs. Work for 30 seconds per exercise and rest for 15 to 30 seconds between moves.
Finish with easy breathing and a comfortable stretch for about one minute. The goal is to leave the session feeling more capable, not exhausted. Repeat this format two or three times per week while you learn which movements suit you.
A 20-minute full-body workout
After a three-minute warm-up, perform two rounds of eight to twelve repetitions of squats, reverse lunges, bridges, bird dogs, push-ups, and shoulder taps. Rest for 30 to 60 seconds between rounds. Move from one exercise to the next at a pace that allows you to keep your posture organized.
Use knee or wall-supported variations whenever needed. You can finish with two minutes of low-impact marching or a gentle yoga flow. This balance gives the legs, core, and upper body attention without making every exercise high intensity.
A 30-minute strength and cardio session
Allow five minutes for the warm-up, then alternate strength and cardio blocks. For example, complete squats, push-ups, and dead bugs, followed by mountain climbers, skater steps, and bear-crawl variations. Repeat the circuit two or three times, resting between rounds.
End with five minutes of mobility and breathing. Keep the cardio intervals short enough that the next strength exercise still looks controlled. If you need additional ideas for a floor-based session, this guided full-body mat workout can help you compare different pacing approaches.
How many sets, repetitions, and rest periods to use
Choose a structure that matches the exercise and your experience. Time-based intervals can be easy to follow, while repetitions make it simpler to track strength progress. The table below offers a starting point rather than a rule.
| Exercise focus | Starting amount | Rest suggestion | Progression idea |
|---|---|---|---|
| Strength movements | 2 sets of 8–12 reps | 45–75 seconds | Add reps or a slower tempo |
| Core stability | 2–3 sets of 15–30 seconds | 30–60 seconds | Extend the hold gradually |
| Low-impact cardio | 3 rounds of 20–40 seconds | 20–40 seconds | Add time before adding impact |
| Mobility work | 5–8 controlled reps | As needed | Increase comfort and range slowly |
Use the lowest end of each range when you are starting or returning after time away. Rest longer if your breathing has not settled or if you cannot maintain the intended form. The best plan is one you can repeat consistently enough to observe progress.
When to increase intensity or take a recovery day
Increase intensity when you can complete the current routine with steady breathing, controlled alignment, and little need for modification. Change only one variable at a time: add a few repetitions, extend an interval, reduce rest slightly, or choose a more challenging variation. Keep the change modest for the first week.
Take a recovery day when soreness changes your movement, your energy is unusually low, or your joints feel irritated. Gentle walking, light mobility, or complete rest may be more useful than forcing another hard session. A portable setup, such as a foldable Yune Yoga mat and towel, can make light movement easier when you are away from home, but convenience should never pressure you to train through pain.
Conclusion
Yoga mat exercises can give you a practical full-body routine with very little equipment. Build from a stable setup and gentle warm-up, train each major area with controlled variations, and progress only when the current version feels dependable. A short session done regularly is a strong foundation for a healthier, more confident movement habit.
Frequently Asked Questions
Can beginners do a full workout on a yoga mat?
Yes. Beginners can combine squats, bridges, modified push-ups, planks, dead bugs, and low-impact cardio for a balanced session. Start with short intervals and simpler variations, then increase the challenge gradually.
How often should I do yoga mat exercises?
Two or three sessions per week is a reasonable starting point for many people. Leave recovery time between demanding workouts and adjust the schedule if soreness or fatigue affects your everyday movement.
Do I need weights for a mat workout?
No. Bodyweight provides plenty of resistance for many exercises. Weights or bands are optional tools that can add challenge once you can perform the movement with consistent control.
How long should a beginner mat workout be?
Ten to twenty minutes is enough to build a useful habit. Include a brief warm-up, a few strength or cardio movements, and a short cooldown rather than trying to fill a longer time with rushed repetitions.
What should I do if my wrists hurt during floor exercises?
Try forearm-based variations, place the hands on a stable raised surface, reduce the time spent bearing weight, or substitute a different exercise. Stop if the discomfort is sharp or persistent and seek professional guidance when needed.
Can mat exercises improve balance?
They can challenge balance through lunges, bird dogs, single-leg bridges, and controlled lateral movements. Use a wall or chair for support while learning, and prioritize steady alignment over performing unsupported variations.
Should I stretch before or after a mat workout?
Use gentle mobility before exercise to prepare for movement, then finish with relaxed stretches or an easy flow. Avoid forcing deep stretches when your muscles are cold or when a position creates pain.

