

The Ultimate Guide on How to Wash a Yoga Mat for a Pristine Practice
Let’s be honest: after a few sweaty yoga sessions, your mat can start to smell a little weird and look a bit grubby. It’s easy to ignore, but learning how to wash a yoga mat is one of those things that makes a big difference for your health and your practice. Whether you’re a daily yogi or roll out your mat once in a while, keeping it clean keeps germs away and helps your mat last longer. Here’s everything you need to know to keep your mat fresh, whatever it’s made of.
Key Takeaways
- Regular cleaning keeps your yoga mat free of germs, sweat, and dirt, making every practice safer and more comfortable.
- You can use simple homemade cleaners, store-bought sprays, or gentle soap—just make sure it’s safe for your mat’s material.
- A quick wipe-down after each session and a deeper clean every few weeks helps your mat stay in good shape.
- Different mats (like rubber, PVC, or cotton) need different cleaning methods, so always check what works best for yours.
- If your mat starts to smell, look worn out, or lose its grip, it might be time to replace it.
Understanding Why Your Yoga Mat Needs Cleaning
It's easy to forget that your yoga mat, your personal sanctuary for practice, needs a little TLC too. Think about it – you're putting your bare skin on it, sweating, and sometimes even doing inversions where your face is pretty close to the surface. Over time, this can lead to a build-up of all sorts of things you'd rather not think about. Keeping your mat clean isn't just about appearances; it's really important for a few key reasons.
Preventing Bacterial Build-Up
Your yoga mat can become a cozy home for bacteria, fungi, and other tiny organisms. Sweat, body oils, and even dirt from your feet can create an environment where these microbes love to hang out and multiply. Regular cleaning is your best defense against this microscopic party. If left unchecked, these germs can lead to skin irritations, minor infections, or just that unpleasant, sticky feeling. A quick wipe-down after each session can make a world of difference in keeping these unwanted guests at bay.
Enhancing Mat Longevity
Think of your yoga mat as an investment. The oils, sweat, and dirt that accumulate on the surface don't just sit there; they can actually break down the material over time. This can cause your mat to lose its grip, develop cracks, or even start to peel. By cleaning your mat regularly, you're removing these damaging substances, helping to preserve its integrity and extend its useful life. It's like giving your mat a spa treatment so it can keep supporting you through all your poses for longer. A clean mat is a happy mat, and a happy mat lasts longer.
Improving Practice Hygiene
Honestly, who wants to practice yoga on a dirty, smelly mat? A clean surface makes for a much more pleasant and focused experience. Lingering odors or a sticky residue can be a real distraction from your flow. Keeping your mat fresh means you can concentrate on your breath and your movements without any unpleasant sensory interruptions. Plus, if you practice in a studio or shared space, a clean mat is just good etiquette. It shows respect for yourself and for others who might use the space after you. It's a simple step that contributes to a more mindful and hygienic practice overall. You can find some great eco-friendly cleaning wipes that are perfect for this.
A clean mat is more than just a surface; it's a foundation for a healthier, more enjoyable, and respectful yoga practice. Making cleaning a habit is a small act of self-care that pays off in many ways.
Choosing the Right Cleaning Solutions
So, you've decided to get serious about cleaning your yoga mat. That's awesome! But before you grab just any old spray bottle, let's talk about what you should actually be using. Picking the right cleaner is key – you want something that tackles sweat and grime without turning your mat into a slippery, degraded mess. It’s not as complicated as it sounds, really.
DIY Natural Cleaners
Making your own cleaner is a fantastic way to go. It's usually cheaper, and you know exactly what's going onto your mat and then potentially onto your skin. Plus, it's way better for the planet.
- Vinegar and Water: A classic for a reason. Mix equal parts white vinegar and water in a spray bottle. This combo is great for general cleaning and disinfecting. You can clean your yoga mat with this solution regularly.
- Essential Oil Boost: Want to add a nice scent and some extra germ-fighting power? Add a few drops of tea tree, lavender, or eucalyptus oil to your vinegar-water mix. Just don't go overboard; a little goes a long way.
- Baking Soda Paste: For those stubborn spots or smells, a paste made from baking soda and a little water can work wonders. Apply it directly to the area, let it sit for a bit, then wipe it away.
Specialized Yoga Mat Cleaners
If DIY isn't your jam, there are plenty of cleaners made specifically for yoga mats. These are often formulated to be safe for various mat materials and effective at removing sweat and oils. Some even come with pleasant, natural scents. When you're looking at these, check the ingredients to make sure they align with what you're comfortable using. For example, some brands offer solutions with essential oils, like MatGuard's deep cleaning solution.
Gentle Soap Alternatives
Sometimes, a simple, gentle soap is all you need. You want to avoid harsh detergents that can break down your mat over time.
- Castile Soap: This is a plant-based soap that's super versatile and gentle. A little bit mixed with water in a spray bottle works well for most mats. It's biodegradable and a good choice if you're trying to be more eco-conscious.
- Mild Dish Soap: In a pinch, a tiny amount of very mild dish soap (like Dr. Bronner's Pure-Castile soap) diluted in water can work. Just make sure it's unscented and free of harsh chemicals. You'll want to rinse thoroughly afterward to get rid of any residue.
The goal is to remove sweat, dirt, and oils without stripping the mat of its grip or damaging its material. Always test a new cleaner on a small, inconspicuous area first if you're unsure.
When choosing, think about your mat's material and how much cleaning it typically needs. A daily spray might be simple, but for deeper cleans, you might need something a bit more robust, like a specialized cleaner or a DIY paste.
Mastering How to Wash Your Yoga Mat
After a sweaty session, washing your yoga mat probably isn’t the first thing you want to do, but skipping it will just make things messier down the road. Getting into a cleaning routine helps your mat stay fresh, last longer, and keeps you feeling good about every practice. Here’s how to really take care of your mat day-to-day and when it needs a deeper scrub.
Daily Cleaning Techniques
- Mix equal parts water and white vinegar in a spray bottle. You can add a drop or two of essential oil for a better scent if you want.
- Lightly spray the entire surface of your mat.
- Wipe it down with a clean, soft microfiber cloth.
- Allow it to air dry before rolling it up.
Doing this basic wipe-down after every practice can save you from having to do a big, involved clean later. The mat never gets too gross, and you always have a comfortable surface for your next session.
For a super quick solution, some people use a spray of water and a few drops of tea tree oil, but even just water and vinegar (as suggested in this technique) will keep your mat from feeling grimy.
Deep Cleaning Process
Sometimes, your mat needs extra attention—especially when it starts feeling sticky, looks stained, or smells not-so-great. Here’s what works best:
- Fill a bathtub or big sink with lukewarm water and just a little mild soap (something gentle—think dish soap or baby shampoo).
- Place the mat in the water, and gently scrub it using a soft sponge or cloth. Focus on any really dirty spots.
- Flip the mat to make sure you clean both sides.
- Drain the soapy water.
If you use too much soap, it will take forever to rinse out, so go easy.
Rinsing and Removing Residue
- Rinse your mat several times with clean water to remove any soap or cleaning solution left behind. If residue remains, it can make the mat slippery the next time you use it.
- Gently squeeze out water by rolling the mat up. Don’t twist it, or you could cause cracks or stretching.
- Lay the mat flat or drape it over a shower rod to finish dripping.
Making sure all the soap is gone will keep your mat feeling normal under your feet, without any weird slick spots or lingering smells.
For a little extra freshness, you can try a quick vinegar spray after rinsing, as it helps with both cleaning and odor—see how a water and vinegar mix works for equipment on this page.
Keeping up these habits means you won’t need to panic about hidden gunk or stinky surprises during your poses. Washing your yoga mat doesn’t have to be complicated, just consistent.
Cleaning Methods for Different Yoga Mat Materials
So, you've got your yoga mat, and you know it needs cleaning, but what's the best way to go about it? It really depends on what your mat is made of. Different materials have different needs, and using the wrong cleaner can actually damage your mat. Let's break down how to care for the most common types.
Caring for Rubber Mats
Rubber mats are awesome for grip, but they can be a bit fussy. Harsh chemicals are a big no-no here because they can break down the rubber over time. Think of it like caring for a nice leather jacket – you need gentle products.
- Mild Soap Solution: Mix a little bit of mild dish soap with water. Use a soft cloth to wipe down the mat. Afterward, make sure you rinse it really well with clean water. Any leftover soap can make your mat super slippery, and nobody wants that during a warrior pose.
- Vinegar and Water: A 50/50 mix of white vinegar and water works well too. It helps disinfect without being too harsh.
- Specialized Cleaners: If you want to be extra safe, there are cleaners made specifically for rubber yoga mats. These are formulated to clean effectively without causing damage.
Always avoid bleach, alcohol, and other strong chemicals on rubber mats. They might seem like they'd work, but they'll just degrade the material faster.
Cleaning PVC or TPE Mats
PVC and TPE mats are generally pretty tough and easier to clean than rubber. They don't absorb moisture as much, which is a plus, but they can still get grimy.
- Daily Wipe Down: For everyday cleaning, just a damp cloth is often enough. Get rid of any sweat or dirt right after your practice.
- Mild Soap and Water: For a deeper clean, use a bit of mild soap mixed with water. Scrub gently with a cloth or sponge.
- Vinegar Solution: A mix of equal parts water and white vinegar is also a good option for disinfecting these mats. Spray it on, let it sit for a few minutes, then wipe it clean.
Remember to always let PVC and TPE mats dry completely before rolling them up. Moisture trapped inside can lead to mold and mildew, which is definitely not what you want.
Washing Cotton or Hemp Rugs
These natural fiber mats are a bit different. They're often used in hotter styles of yoga and can handle a bit more. Some can even go in the washing machine!
- Machine Wash (Check Label First!): Many cotton or hemp mats can be washed in a washing machine on a gentle cycle with cold water. Use a mild detergent. Always check the manufacturer's instructions first, though.
- Hand Washing: If machine washing isn't an option, you can hand wash them in a tub with cool water and a gentle soap. Gently scrub any dirty spots.
- Vinegar Rinse: Adding about half a cup of white vinegar to the rinse cycle can help keep them fresh and remove any lingering odors.
Air drying is best for these. Hang them up somewhere with good airflow, but avoid direct sun, which can fade the colors.
Special Care for PU Mats
Polyurethane (PU) mats are known for their amazing grip, especially when wet. They have a unique surface that requires careful cleaning to maintain that stickiness.
- Gentle Wipe: After each use, wipe down your PU mat with a damp cloth. This removes surface sweat and dirt.
- Mild Soap Solution: For a more thorough clean, use a very mild soap (like a gentle hand soap or specialized mat cleaner) mixed with water. Use a soft cloth and wipe gently. Avoid scrubbing hard, as this can damage the PU surface.
- Avoid Soaking: Never soak a PU mat in water. They don't handle being submerged well and can take ages to dry, potentially leading to damage.
The key with PU mats is to be gentle and avoid harsh chemicals or excessive moisture. A quick wipe-down after practice and a more thorough clean every few weeks should keep it in top shape for your yoga practice.
Drying and Storing Your Yoga Mat Properly
So, you've gone through the whole cleaning process, and your mat is sparkling. Awesome! But don't just roll it up and shove it in your bag just yet. How you dry and store your mat is actually a pretty big deal. Get this wrong, and you could undo all your hard work, ending up with a mat that smells less than fresh or even starts to break down faster than it should.
Effective Drying Techniques
The most important thing here is to let your mat air dry completely. Seriously, this step is non-negotiable. Rushing it is how you end up with that dreaded mildew smell. Here’s how to do it right:
- Hang it up: Drape your mat over a shower rod, a sturdy clothesline, or even the back of a chair. The goal is to allow air to circulate all around it. Avoid folding it or laying it flat on a surface where moisture can get trapped underneath.
- Find a good spot: Choose a well-ventilated area. An open room or a spot near an open window works well. If you can, avoid direct sunlight, especially for rubber mats, as it can cause the material to degrade over time.
- Be patient: Drying time can vary. Depending on the mat's thickness and the humidity in your home, it could take anywhere from a few hours to a full day. Don't roll it up until you're absolutely sure it's dry to the touch on both sides.
You might be tempted to speed things up with a hairdryer, but it's generally not recommended. High heat can damage the mat's material, making it brittle or less grippy. Stick to good old-fashioned air drying.
Proper Storage Practices
Once your mat is bone dry, it's time to think about where it's going to live when you're not using it. Proper storage protects your mat from dust, dirt, and damage, helping it stay in good condition for longer.
- Roll it up: Always roll your mat, rather than folding it. Folding can create creases that might not come out and can weaken the material over time. When rolling, try to keep it snug but not so tight that you're stretching the mat.
- Use a mat bag: A dedicated yoga mat bag is a great investment. It keeps your mat clean and protected from the elements when you're transporting it or just storing it at home. Look for one that's breathable if possible.
- Find a cool, dry place: Store your rolled-up mat in a closet, under a bed, or anywhere it won't be exposed to extreme temperatures or moisture. Avoid leaving it in a hot car or a damp basement. For materials like rubber, keeping it out of direct sunlight even during storage is a good idea like this Manduka mat.
Taking these simple steps for drying and storage will make a big difference in how long your mat lasts and how pleasant your practice feels.
Addressing Stubborn Stains and Odors
Even with regular cleaning, sometimes your yoga mat can pick up some tough spots or start to smell a bit funky. Sweat, dirt, and maybe even that smoothie you dropped can leave their mark. But don't worry, there are ways to bring your mat back to life.
Tackling Tough Stains
When a simple wipe-down isn't enough, it's time to bring out the heavy hitters. Before you reach for anything too harsh, try some natural remedies. They're often just as effective and much kinder to your mat.
- Baking Soda Paste: Mix baking soda with a little water to make a paste. Slather it onto the stain, let it sit for about 15-20 minutes, then gently scrub with a soft cloth. This works well for discoloration.
- Vinegar Solution: A 50/50 mix of white vinegar and water is a great stain fighter and deodorizer. Spray it on, let it sit for a few minutes, and wipe clean.
- Lemon Juice: For lighter marks, try applying lemon juice directly to the stain. Let it sit in the sun for about 30 minutes – the sun can help bleach the stain. Just be sure to rinse it off well afterward.
Always test any cleaning solution on a small, hidden spot first to make sure it doesn't damage or discolor your mat. For more involved cleaning, especially for materials like rubber, you might want to check out specific deep cleaning instructions.
Eliminating Lingering Smells
Sometimes a mat looks clean but still holds onto odors. Here’s how to freshen it up:
- Baking Soda Sprinkle: Cover your mat with baking soda, let it sit for a few hours or overnight, then vacuum it up. Baking soda is a fantastic odor absorber.
- Essential Oils: Add a few drops of essential oils like tea tree, lavender, or eucalyptus to your regular cleaning spray. It helps with smells and leaves your mat smelling nice.
- Sunlight and Fresh Air: Letting your mat air out in the sun for a bit can help kill odor-causing bacteria. Just don't leave it out too long, as too much sun can damage some materials.
Dealing with persistent smells or stains can be frustrating, but remember that different mat materials might need slightly different approaches. What works for one might not be ideal for another, so always consider what your mat is made of before trying a new cleaning method.
If you've tried everything and the stains or smells just won't budge, it might be time to consider if your mat has reached the end of its useful life. Sometimes, a deep clean just isn't enough to revive a well-loved mat.
Knowing When It's Time for a New Mat
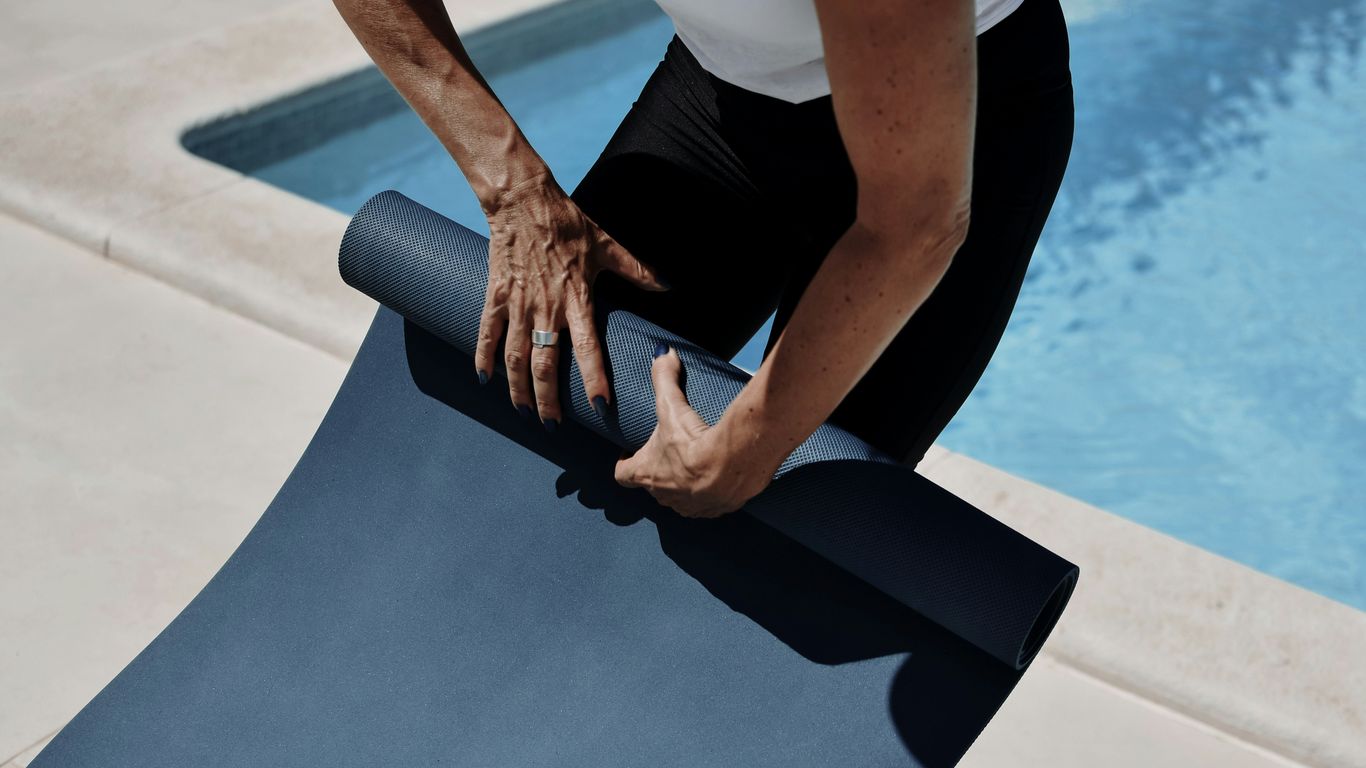
Even with the best cleaning routine, your yoga mat won't last forever. Think of it like your favorite pair of running shoes; they give you great support for a while, but eventually, they just wear out. Your mat is no different. Paying attention to the signs of wear and tear is key to maintaining a safe and comfortable practice. A mat that's past its prime can actually hinder your progress and even lead to injuries.
Signs of Wear and Tear
So, how do you know when your trusty mat has seen better days? Here are some common indicators:
- Slippery Surface: Even after cleaning, if your hands and feet slide around during poses, the mat has likely lost its grip. This is a major safety concern, especially in poses that require stability.
- Visible Damage: Look for tears, rips, or thinning areas. If the mat is starting to flake or peel, it's definitely on its way out.
- Loss of Cushioning: Does your mat feel flat and unsupportive? If you can feel the floor too easily through it, it's not providing the joint protection you need.
- Persistent Odors: You've tried everything – deep cleaning, airing it out – but that musty smell just won't budge. This often means the material has absorbed too much and can harbor bacteria.
- Cracking or Brittleness: Especially common in older rubber mats, if the surface starts to look cracked or feels stiff and brittle, it's losing its flexibility and integrity.
Considering Mat Replacement
When you notice several of these signs, it's probably time to start looking for a replacement. A mat that's falling apart isn't just unappealing; it's a potential hazard. Think about how much you rely on your mat for stability and comfort during your practice. Investing in a new one means investing in your continued well-being and practice quality. It might seem like a small thing, but a good mat makes a big difference. Don't wait until you slip and fall to decide it's time for an upgrade. A mat typically lasts anywhere from one to three years, depending on how often you use it and the material it's made from. For example, a frequently used rubber mat might need replacing sooner than a less-used PVC one. When you do get a new mat, consider what worked and what didn't with your old one to make an informed choice for your next yoga mat purchase.
Replacing your yoga mat isn't a failure; it's a natural part of the practice journey. It shows you're committed to your well-being and are willing to invest in the tools that support your growth. A fresh mat can bring new energy and confidence to your sessions.
Keep Your Practice Fresh
So, there you have it. Keeping your yoga mat clean is actually a pretty big deal, not just for making it last longer, but for your own health too. If you just stick to these simple steps, your mat will stay a nice, clean spot for you to do your thing. Whether you do a quick wipe-down every day or a deeper clean every now and then, remember that taking care of your mat shows you care about your yoga journey. Make these cleaning habits part of your whole yoga routine, and your mat will be just as ready as you are for every single session.
Frequently Asked Questions
Why is it important to clean my yoga mat?
Cleaning your yoga mat is like giving your personal practice space a little TLC! It helps stop yucky germs and bacteria from growing, which can make you sick or cause skin problems. Plus, a clean mat feels way better to practice on and helps it last longer, so you don't have to buy a new one as often. It's all about keeping your practice healthy and enjoyable.
What's the best way to clean my mat after each yoga session?
After you finish your yoga, just grab a clean cloth or paper towel. You can lightly spray your mat with a mix of water and a little bit of gentle soap or a special yoga mat cleaner. Then, wipe it all down. Make sure to let it air dry completely before you roll it up. This quick clean stops sweat and dirt from building up.
How often should I do a deep clean of my yoga mat?
It's a good idea to give your mat a deep clean every few weeks, or more often if you sweat a lot during your practices. A deep clean involves a more thorough washing, like using a special cleaner or a mild soap and water mixture, and making sure to rinse and dry it really well. This helps get rid of any deeper grime or smells.
Can I use household cleaners like bleach or strong soaps on my yoga mat?
It's best to avoid harsh cleaners like bleach, alcohol, or strong soaps. These can damage the material of your mat, making it slippery or causing it to break down faster. Stick to gentle, natural cleaners or ones specifically made for yoga mats to keep your mat safe and in good condition.
How do I dry my yoga mat properly?
Drying is super important! Never put your yoga mat in a dryer. Instead, hang it up to air dry in a place with good airflow, like over a shower rod or on a clothesline. Keep it out of direct sunlight, as the sun can make some mat materials brittle. Make sure it's totally dry before you roll it up to prevent mold or funky smells.
When should I think about getting a new yoga mat?
Even with good care, mats get worn out. If your mat starts to look really torn or worn, if it doesn't feel as soft or supportive as it used to, or if you just can't get rid of bad smells no matter how much you clean it, it's probably time for a new one. A slippery mat is also a sign that it's time for a replacement.


