
Unlock Flexibility: 12 Essential Yoga Poses for Hips
Feeling a bit stiff in your hips? You're not alone. So many of us spend hours sitting, which can really tighten things up down there. But guess what? Yoga can be a total game-changer. It's not just about fancy poses or touching your toes; it's about making your body feel better, move easier, and just generally feel less creaky. If you're looking to improve your hip flexibility, these yoga poses for hips are a solid place to start. They're pretty straightforward and can make a real difference.
Key Takeaways
- Adding these yoga poses for hips to your routine can help you feel more flexible.
- Practicing regularly can ease tightness and discomfort in your hips.
- Each pose works different parts of your hips, helping you move better overall.
- Always listen to your body and change poses if you need to; being comfortable is the main thing.
- Try to do these poses a few times each week for the best results.
1. Cobbler's Pose
Cobbler's Pose, also known as Baddha Konasana or Bound Angle Pose, is a fantastic seated posture that really helps open up the hips and groin. It’s a great one to start with if you’re feeling a bit stiff in your hips from sitting too much or just general life. This pose is all about gently encouraging your hips to open. It’s not about forcing anything, just a nice, steady stretch.
Here’s how to get into it:
- Start by sitting on the floor with your legs extended straight out in front of you.
- Bend your knees and bring the soles of your feet together. Let your knees fall out to the sides.
- Draw your heels in towards your pelvis as close as is comfortable for you. You can hold onto your feet or ankles.
- Sit up tall, lengthening your spine. You can stay here, or if it feels good, gently hinge forward from your hips, keeping your back relatively straight.
It’s pretty common for knees to be a bit higher than your hips, especially when you’re starting out. Don’t worry about that at all. You can always place blocks or blankets under your knees for support if you feel any strain.
This pose is really good for improving flexibility in your hips and groin area. It can also help calm the nervous system, which is always a bonus.
Remember to breathe deeply throughout the pose. You should feel a gentle stretch in your inner thighs and hips. If you want to explore more seated poses that help with flexibility, check out this guide to hip-opening yoga.
2. Pigeon Pose
Alright, let's talk about Pigeon Pose, or Eka Pada Rajakapotasana if you want to get fancy with the Sanskrit. This one is a real game-changer for hip flexibility. It really gets into those muscles that tend to get all bunched up from sitting around all day, like your glutes and hip flexors. It's a deep hip opener that targets the hip flexors, glutes, and outer thighs.
Getting into it can feel a bit intense at first, especially if your hips are feeling particularly stubborn. The key is to listen to your body. Don't force anything. If you feel a sharp pain, ease back. It's way better to get a gentle stretch than to risk hurting yourself.
Here’s a basic rundown:
- Start on your hands and knees, like you're in a tabletop position.
- Bring one knee forward towards the wrist on the same side. You'll want to angle your shin across your body. The more parallel your shin is to the front of your mat, the deeper the stretch will be.
- Extend your other leg straight back behind you. Try to keep your hips as square as possible, meaning both hip points are facing forward.
- You can stay upright, resting your hands on the floor, or fold forward over your front leg, maybe resting on your forearms or even your chest if you're feeling open.
If your hip doesn't quite reach the floor, which is super common, don't worry. You can totally use a block or a folded blanket under that hip for support. It makes a world of difference in keeping your hips level and making the pose more comfortable. It's a great way to work on hip opening.
Remember, consistency is key. Doing this pose regularly can really help release tension and improve your range of motion. Just be patient with yourself and enjoy the process.
3. King Pigeon Pose
King Pigeon Pose, or Eka Pada Rajakapotasana II, is a more advanced variation that builds upon the foundation of Half Pigeon. It's a pose that really challenges your flexibility and strength, especially in the hips and spine. When I first attempted this, it felt like a huge leap from Half Pigeon, but the feeling of opening up afterwards is pretty amazing. It's definitely a pose to approach with patience and respect for your body's limits.
To get into King Pigeon, you typically start from a Half Pigeon position. From there, the goal is to bend your back leg and reach for your foot with the hand on the same side. It's a deep backbend and hip opener all in one. The key is to keep your hips as level as possible, even as you draw that back foot closer.
Here’s a general idea of how to move into it:
- Start in a comfortable Half Pigeon pose.
- Bend your back knee, bringing your heel towards your glute.
- Reach your hand on the same side as your back leg around to grasp your foot.
- Gently draw the foot closer, deepening the stretch in your quad and hip flexor.
- You can stay upright or, if it feels right, start to lean back slightly, perhaps bringing your chest towards the ceiling.
Modifications are your best friend here. If reaching your foot is a struggle, a strap or towel looped around your foot can make all the difference. It helps you maintain the connection without straining. Also, if you feel any pinching in your knee or hip, it's a sign to ease back or try a different variation. This pose is fantastic for improving spinal mobility and opening the chest, but only if you're ready for it. It's a great way to work towards greater hip opening.
Remember, the journey into King Pigeon is as important as the pose itself. Focus on the sensations in your body and celebrate the progress, no matter how small. It's not about perfection, but about mindful movement and self-discovery.
4. Lizard Pose
How to do it:
- Start on your hands and knees, like you're about to do Cat-Cow.
- Bring your right knee forward towards your right wrist. Angle your shin so it's somewhat across your body. The more parallel your shin is to the front of your mat, the deeper the stretch will be.
- Slide your left leg straight back behind you. Try to keep your hips square to the front of the mat. This means both hip points should be facing forward, not one higher than the other.
- You can stay up on your hands, or for a deeper stretch, lower down onto your forearms. If your forearms don't quite reach the floor, no worries! You can place blocks or folded blankets under them for support.
- Focus on breathing deeply and relaxing into the stretch.
Why it works:
Lizard Pose is a really intense hip opener. It targets those hip flexors, which can get super tight from sitting all day. It also gives your quads and hamstrings a good stretch. It's a fantastic pose for improving flexibility in your lower body and can help release a lot of built-up tension. It’s excellent for deepening flexibility in the lower body. You can also drop your back knee to the floor for a gentler version of the stretch, or keep it lifted if you want to feel it more intensely. It’s a great way to stretch and strengthen the hip flexors, quads, glutes, and hamstrings. You can find more about Lizard Pose and its benefits online.
This pose might feel a bit challenging at first, especially if your hips are really tight. Don't push yourself too hard. It's better to hold the pose with good form and a gentle stretch than to force it and risk injury. Listen to your body; that's the most important thing.
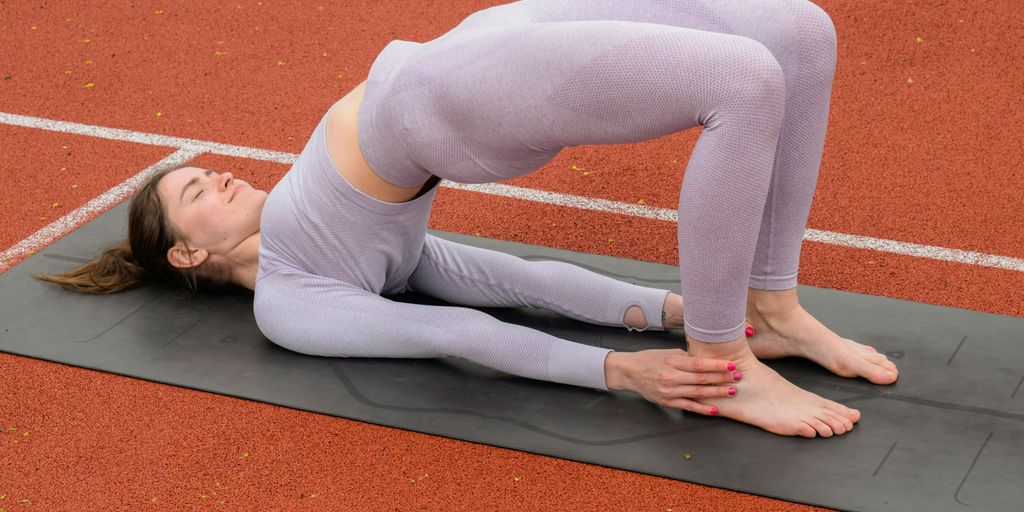
5. Triangle Pose
Triangle Pose, or Trikonasana, is a standing pose that really opens up the hips and hamstrings. It’s also great for your balance and helps to lengthen your spine. I find it’s a good one to do after a lot of sitting, as it really gets things moving in the hips and legs.
Here’s how to get into it:
- Start by standing with your feet about three to four feet apart. Turn your right foot out 90 degrees and your left foot in slightly.
- Extend your arms out to the sides, parallel to the floor.
- As you exhale, hinge at your hips and reach your right hand down towards your right shin, ankle, or the floor.
- Reach your left arm straight up towards the ceiling, creating a straight line from your bottom hand to your top hand.
- Keep your gaze soft, perhaps looking up towards your top hand if that feels okay for your neck.
- Hold for about 30 seconds to a minute, breathing deeply, and then switch sides.
This pose is fantastic for improving flexibility in the hips, hamstrings, and torso. It also strengthens your thighs, knees, and ankles. If you’re finding it tough to reach the floor, don’t worry! You can always use a yoga block under your bottom hand for support. Just focus on keeping both sides of your torso long and your legs engaged. It’s a pose that really makes you feel open and spacious.
6. Butterfly Pose
Butterfly Pose, or Baddha Konasana, is a really accessible pose that gently opens up the hips and stretches the inner thighs and groin. It’s a fantastic way to release tension, especially if you spend a lot of time sitting. I find it’s a great one to do when I just want to chill and connect with my body.
Here’s how I usually get into it:
- Sit on the floor with your spine tall. Sometimes I put a folded blanket under my hips to help tilt my pelvis forward a bit, which really helps me feel the stretch better.
- Bring the soles of your feet together, letting your knees fall open to the sides. Don't push them down; just let gravity do the work. It’s important to be gentle here.
- You can hold onto your feet or ankles. From here, you can stay upright, or if it feels good, gently fold forward from your hips. I usually just go as far as feels comfortable for me.
- Take deep breaths and try to relax into the pose. I aim to hold it for at least 30 seconds, but often longer if my hips are feeling particularly tight.
This pose is wonderful for increasing flexibility in the hips and groin area. If your knees are a bit high, don't worry about it. You can place blocks or folded blankets under your knees for support. It’s all about finding what feels right for your body. For a slightly different sensation, you can adjust how close you bring your heels to your body; closer heels target the groin and inner thighs more, while moving them further away can shift the stretch to your outer hips. It’s a great way to explore what your body needs. If you're looking for more hip openers, you might want to check out Butterfly Pose benefits.
Remember, the goal isn't to force yourself into a certain shape, but to breathe and allow your body to open up naturally. Be patient with yourself; consistency is key.
7. Garland Pose
Garland Pose, or Malasana, is a squatting posture that really gets into the hips and groin. It feels like a natural position, almost like we’re meant to squat like this, but modern life often makes it tough. This pose is great for opening up those tight hips and can also help with digestion. It’s a pose that feels grounding and can bring a sense of calm.
How to do it:
- Start with your feet a little wider than hip-width apart. You can turn your toes out slightly if that feels more comfortable.
- Bend your knees and lower your hips down towards the floor, as if you’re going to sit in a chair, but lower. Aim to get your hips as close to your heels as you can without lifting them off the ground.
- Bring your hands together at your chest in a prayer position, or place your elbows on the inside of your knees and press them gently outward. This helps to deepen the stretch.
- Keep your spine long and your chest lifted. Try to relax your shoulders away from your ears.
Modifications:
- If your heels don’t reach the floor, that’s totally fine. You can place a rolled-up blanket or a yoga block under your heels for support. This makes the pose much more accessible.
- If it’s hard to get low enough, you can also try squatting with your back against a wall for support.
This pose is a fantastic way to improve hip mobility and can be a real game-changer for anyone who spends a lot of time sitting. It’s a simple movement that can have big benefits for your lower back and overall flexibility.
I find that holding Malasana for a few breaths really helps to release tension in my hips after a long day. It’s a good one to include if you’re looking to improve your hip flexibility.
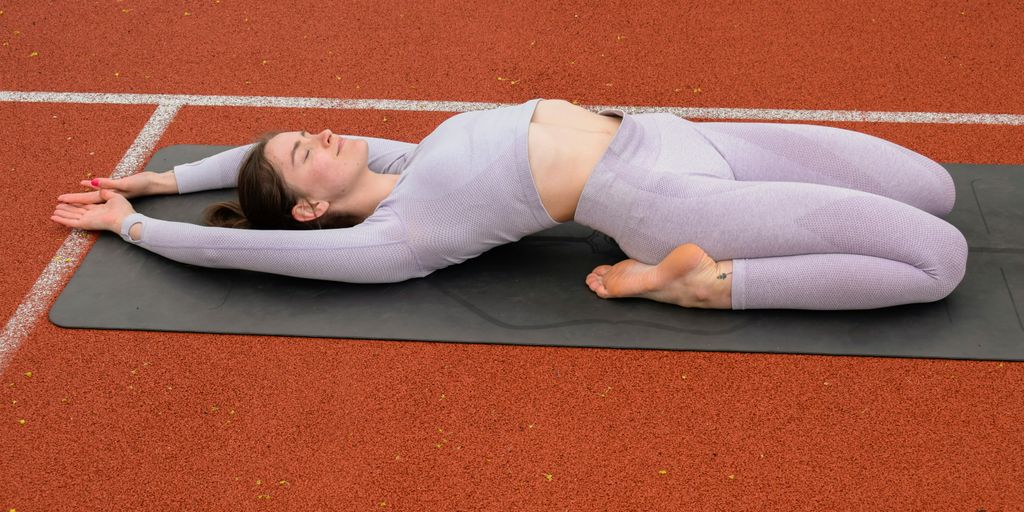
8. Happy Baby Pose
This pose is a real treat for your hips and lower back. It’s called Happy Baby, and honestly, it feels just like that – a playful, gentle way to unwind. It’s like giving yourself a little hug while stretching out those tight spots. When I first tried it, I felt a bit silly, but now it’s a go-to for me after a long day. It really helps release tension and feels good.
Here’s how to get into it:
- Start by lying on your back. Bring your knees up towards your chest. Don't worry if they don't get all the way there; just go to where it feels comfortable for you.
- Next, widen your knees, aiming to bring them towards your armpits. Think about gently pressing your knees down towards the floor on either side of your torso.
- Reach for the outside edges of your feet with your hands. If reaching your feet is a stretch, grab your ankles or shins instead. The main thing is to create a gentle opening, not to force anything.
- Keep your feet flexed, as if you're trying to press them up towards the ceiling. This helps your legs stay engaged and keeps your knees safe.
- You can gently rock from side to side. This movement can feel like a nice little massage for your lower back.
This pose is great for opening up the hips and inner thighs, and it also helps to ease tension in the lower back. It’s a simple yet effective way to bring some relief and flexibility to your body. You can find more about this pose and its benefits at happy baby pose.
Try to hold this pose for at least 30 seconds, breathing deeply. It’s a wonderful way to finish a hip-focused yoga session.
9. Low Lunge
This pose is a real workhorse for opening up those tight hip flexors, the muscles at the front of your hips that can get all bunched up from sitting around too much. Honestly, it feels like a gentle hug for your hips. When I first started yoga, this one felt pretty intense, but it’s become a staple for me. It’s pretty straightforward to get into, too.
Here’s the basic idea:
- Start on your hands and knees. Step one foot forward so it lands between your hands. Make sure your front knee is stacked right over your ankle – no cheating!
- Slide your back knee further back until you feel a nice stretch in the front of your hip. You can keep your back knee on the ground for a gentler stretch, or lift it up if you want more intensity.
- Keep your torso upright. You can rest your hands on your front thigh, or for a bit more, reach your arms up towards the ceiling.
It’s super important to listen to your body here; you want a stretch, not a strain. If it feels like too much, just back off a little. You can always put a folded blanket or a cushion under your back knee for extra padding. It really helps with comfort, especially on harder floors. This pose is great for improving your posture and can even help ease some lower back discomfort. Just remember to breathe and relax into it. It’s a simple pose, but it makes a big difference in how your hips feel. You can find some great yoga mats that offer extra cushioning for poses like this on our recommended gear page.
You should feel the stretch along the front of your back leg, in the hip flexor of your front leg, and maybe even your outer hip. Try to draw your inner thighs towards each other to get a better extension through the front line of your back leg.
10. Crescent Moon
Crescent Moon, or Ashta Chandrasana, is a fantastic pose for opening up the front of your hips, especially if you spend a lot of time sitting. It's like a gentle wake-up call for those tight hip flexors. You start from a Low Lunge, so if you've already done that one, you're halfway there!
Here’s how to get into it:
- From your Low Lunge, gently lower your back knee to the mat. You can put a blanket under your knee if it feels more comfortable.
- Reach your arms straight up towards the sky, letting your shoulders relax away from your ears.
- Keep your front knee stacked directly over your ankle. This is super important for knee safety.
- Gently draw your hips and belly towards your center line. This helps you avoid just leaning back and puts the stretch where you want it.
- Try to pull your hips forward slightly. You should feel a nice stretch along the front of your back leg.
This pose is great for improving balance and strengthening your legs. It really helps to lengthen the muscles in the front of your hip. If you want to go a little deeper, you can try a gentle backbend by bringing your arms into a cactus shape, but only if it feels good. Remember to breathe; holding your breath won't help the stretch. It’s a good idea to practice this regularly if you find yourself sitting a lot during the day. For a bit more hip opening, you might want to try Ardha Chandrasana later on.
Modifications:
- For a deeper stretch: Step your front foot a little further forward. Make sure your knee stays over your ankle.
- For less sensation: Step your front foot slightly back, but keep your torso upright and your knee stacked over your ankle.
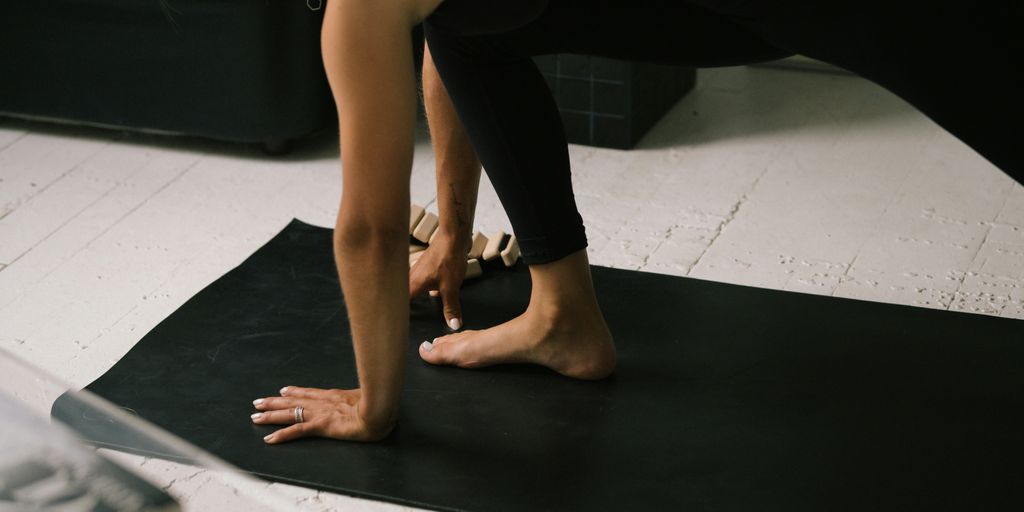
11. Runner's Lunge
Runner's Lunge is a fantastic pose for really getting into those hip flexors, especially the ones on your back leg. It's a bit like a deeper version of a low lunge. You start from a low lunge position, then you just walk your front foot a little further forward, towards your hands. Make sure your front knee stays right over your ankle, and then you can drop your back knee down to the mat. You should feel a good stretch along the front of your back leg and also in the front hip of your front leg.
How to do Runner's Lunge:
- Start in a low lunge with your right foot forward.
- Walk your right foot slightly forward, about six inches.
- Drop your left knee to the mat, keeping your toes untucked.
- Ensure your right knee is stacked directly over your right ankle.
- You can keep your hands on the mat for support, or bring them to your front thigh.
- For a deeper stretch, you can bring your hands overhead.
Yogi Tip:
If you want to get a bit more out of this pose, you can try rolling to the outside edge of your back foot. This helps with a slight external rotation in your hips. Alternatively, you can hug your back knee in towards your body. Some people find it helpful to place blocks under their hands or forearms if the ground feels too far away, which can make the pose more accessible. This pose is also a great way to prepare for more intense hip openers, and it's a good idea to check out resources on yoga poses for hip opening to see how it fits into a broader practice.
This pose really targets the muscles that tend to get tight from sitting a lot. It helps to create more space in the hips and can feel really good after a long day.
12. Wide-Legged Forward Bend
This pose is fantastic for opening up your hips and hamstrings. It really helps release tension that can build up from sitting all day. I remember when I first started doing yoga, this pose felt impossible. My hamstrings were so tight, I could barely fold forward an inch! But with practice, it gets so much better.
Here’s how to get into it:
- Start standing with your feet spread wide apart. Find a distance that feels like a good stretch but isn't painful. You want your legs to be stable.
- Inhale and reach your arms up towards the ceiling, lengthening your spine.
- Exhale and hinge forward from your hips. Keep your back as straight as you can, leading with your chest. Let your hands rest on the floor, your ankles, or even yoga blocks if the floor feels too far away.
- Let your head and neck relax. You can bend your knees a little if your hamstrings are tight – that’s totally okay!
The goal here is to create length in your spine as you fold, not to force yourself to the floor.
Focus on your breath. With each inhale, imagine your spine getting longer. With each exhale, try to release a little more tension in your hips and hamstrings. It’s a gentle process.
This pose is a great way to improve hip flexibility over time. If you're looking for more ways to ease hip tightness, this sequence might help ease hip tightness.
Try holding it for 30 seconds to a minute. You'll feel a nice stretch along the back of your legs and in your inner thighs.
Keep Moving Your Hips
So, we've gone through a bunch of yoga poses that can really help make your hips more flexible. The main thing to remember is to keep at it. Try to do these stretches regularly, and don't expect miracles overnight. Everyone's body is different, and flexibility takes time to build. If something feels off or causes pain, just ease up or try a different variation. The goal here is to feel better and enjoy moving. Stick with it, and you'll likely start to notice your hips feeling looser and moving more freely. Happy stretching!
Frequently Asked Questions
How can yoga help with hip flexibility?
Yoga is a great way to make your hips more flexible. Poses like Cobbler's Pose and Pigeon Pose help stretch the muscles around your hips, making them feel better and move more easily. Doing these poses regularly can help you feel less stiff and move more freely in your everyday life.
What if my hips are too tight for these poses?
If you're new to yoga or your hips feel very tight, it's a good idea to use props like blankets or cushions. Placing them under your hips can help you sit up straighter and make the poses more comfortable. Always listen to your body and avoid any sharp pain.
Should I do these poses on both sides of my body?
Yes, it's important to do these hip-opening poses on both sides of your body. You might find that one side feels tighter or more flexible than the other, and that's perfectly normal. Being consistent with both sides will help improve overall balance and flexibility.
Are all these yoga poses good for beginners?
While some poses like King Pigeon Pose can be challenging, most of these 12 yoga poses are suitable for beginners. Poses like Cobbler's Pose, Low Lunge, and Butterfly Pose are especially good starting points. Remember to modify poses if needed and focus on how the stretch feels in your body.
Why is hip flexibility important?
Tight hips can make it hard to move comfortably and might even cause back pain. By regularly practicing yoga poses that open up your hips, you can relieve this tightness, improve your posture, and move with greater ease throughout the day.
How often should I practice these yoga poses for best results?
Consistency is key! Try to practice these hip-opening yoga poses several times a week. Even a short, regular practice can lead to noticeable improvements in your hip mobility and overall flexibility over time. Don't rush the process; enjoy how your body feels.