Transform Your Practice: 10 Essential Hip Openers Yoga Poses for Flexibility and Relaxation
If you're looking to improve your flexibility and find some relaxation, hip openers yoga poses are a great place to start. These poses help to release tension in your hips, which can often feel tight from sitting or physical activity. By incorporating these ten essential hip openers into your practice, you'll not only enhance your flexibility but also promote a sense of calm and balance in your body. Let's dive into these poses and discover how they can transform your yoga routine!
Key Takeaways
- Hip openers yoga poses can significantly improve flexibility in the hips.
- Regular practice can help reduce tension and discomfort in the body.
- These poses aid in emotional release and promote relaxation.
- Incorporating hip openers into your routine can enhance overall mobility.
- Listening to your body is crucial when practicing these poses.
1. Lizard Pose

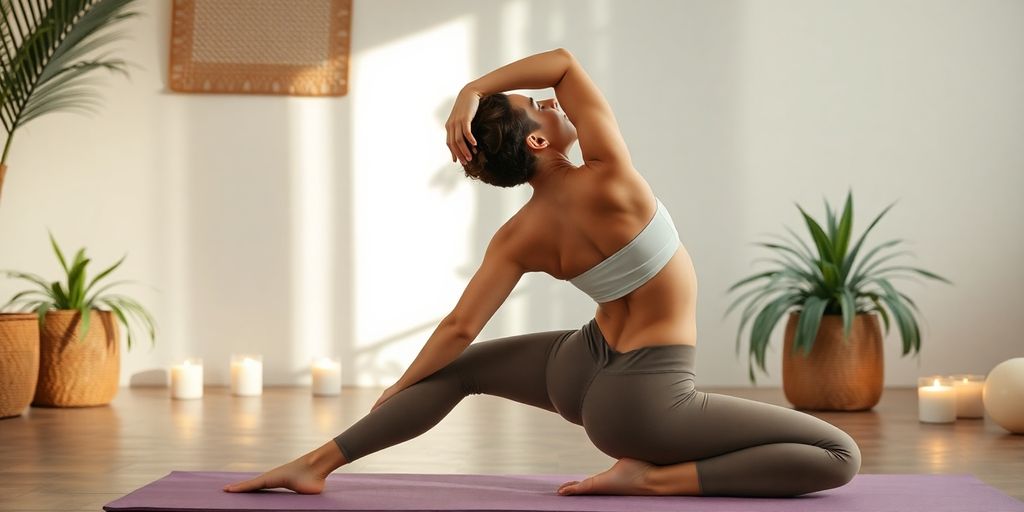
Lizard Pose, or Utthan Pristhasana, is a fantastic way to really get into those hips. It's an intermediate pose, so don't worry if you can't get super deep right away. This pose primarily targets your hip rotators and flexors, as well as your quadriceps.
Here's a basic way to get into it:
- Start in a Low Lunge.
- Walk your front foot to the outside of your hand.
- You can stay on your hands or lower to your forearms for a deeper stretch.
Remember to breathe deeply and listen to your body. If you feel any sharp pain, back off a bit. It's all about finding that edge where you feel a good stretch without pushing too far.
It's a great pose to improve mental clarity and overall flexibility. You can hold the pose for about 30 seconds to a minute on each side, focusing on relaxing into the stretch. It's not about how far you can go, but how much you can release.
2. Pigeon Pose
Pigeon Pose is a fantastic way to really get into those hips. It might look intimidating, but with a few modifications, it's accessible to most people. I remember the first time I tried it; I felt like my hip was going to explode! But after a few tries, and with some gentle adjustments, it became one of my favorite stretches. It's a great way to release tension and improve flexibility.
Here's a basic breakdown of how to get into it:
- Start in Downward-Facing Dog.
- Bring one knee forward towards your wrist on the same side.
- Angle your shin towards the opposite wrist.
- Slide your back leg straight back, keeping your hips square.
- Fold forward over your front leg.
Remember, it's not about how far you can go, but how it feels. If you're experiencing pain, back off a little. Use props like blankets or blocks to support yourself.
It's also important to remember to do both sides! I sometimes forget and then I'm all lopsided. You can also try the reclined half pigeon variation if the full pose is too intense. It's a great way to get a similar stretch while lying on your back. This pose stretches your lower back, gluteal and outer hip muscles.
3. Crescent Lunge
The Crescent Lunge is a fantastic pose to incorporate because it really gets into those hip flexors. I remember the first time I tried it, I could barely keep my balance! It's definitely a pose that gets easier with practice. This pose is great for lengthening hip flexors and calves, opening the chest, and stretching the shoulders, back, and abdominal wall.
Here's how I usually get into it:
- Start in a long, low lunge position.
- Straighten your back leg, lifting the heel off the floor. It might take some effort to get that back leg completely straight, and that's okay!
- Reach your arms overhead, sliding your shoulder blades down your back. Try not to shrug your shoulders up by your ears.
I find that focusing on my breath really helps me deepen the stretch and maintain my balance. Inhale as you reach up, and exhale as you sink a little deeper into the lunge. It makes a world of difference.
If you're looking to modify, you can always keep your back knee on the ground for a Low Lunge variation. It still provides a good stretch, but it's a bit more gentle. You can also try a high lunge variation for an added challenge.
4. Extended Hand-to-Big Toe Pose
Okay, so this one might look a little intimidating, but trust me, it's super rewarding. It's all about balance and stretching those hamstrings. I remember the first time I tried it, I wobbled all over the place, but with practice, it gets easier. Now, I can (almost) hold it without looking like I'm about to fall over!
This pose is great because it really forces you to focus. You're engaging your core, lengthening your spine, and opening up your hips all at the same time. Plus, it's a fantastic way to improve your posture. I've noticed a big difference in how I stand and sit since I started incorporating this into my routine. It's not just about flexibility; it's about body awareness too.
Here's a basic breakdown of how to do it:
- Start in a standing position.
- Ground yourself by pressing firmly into your standing foot.
- Slowly lift one knee towards your chest, grabbing your big toe (or using a strap if you can't reach).
- Extend your leg straight out in front of you, keeping a slight bend in your knee if needed.
- Hold for a few breaths, then slowly release.
Don't worry if you can't extend your leg fully straight. The goal is to feel a stretch, not to force anything. Listen to your body and modify as needed. It's all about progress, not perfection.
It's a journey, not a destination, right? And hey, even if you wobble a bit, you're still getting a good stretch and working on your balance. So, give it a try and see how it feels. You might just surprise yourself!
5. Side Lunge

The side lunge, also known as Skandasana, is a fantastic way to open up your inner thighs and groin. I remember the first time I tried this, I was so tight I could barely get down! But with practice, it's become one of my favorite stretches. It's great because it works on balance and strength at the same time.
This pose is excellent for improving hip mobility and flexibility.
Here's how I usually do it:
- Start standing with your feet hip-width apart.
- Take a big step to the side with one foot, bending that knee and keeping the other leg straight.
- Keep your bent knee over your ankle and your foot pointing forward.
- Try to keep your chest lifted and your back straight. You can bring your hands to your heart center for balance.
- Hold for a few breaths, then switch sides. I usually do about 5-10 reps on each side.
I find that focusing on my breath really helps me sink deeper into the stretch. If you're having trouble with balance, try holding onto a chair or wall. Don't push yourself too hard, especially when you're just starting out. It's all about listening to your body and finding what feels good.
It's a simple pose, but it can make a big difference in your hip flexibility. I've noticed a real improvement in my hip mobility since I started incorporating side lunges into my routine.
6. Cow Face Pose
Okay, so Cow Face Pose (Gomukhasana) might sound a little silly, but trust me, it's a great one. It's one of those poses that looks way easier than it actually is, especially if you're tight in the hips or shoulders. I remember the first time I tried it; I was so far from getting my hands to clasp behind my back, it was almost comical. But hey, that's yoga, right? It's all about the journey, not the destination.
This pose is fantastic for opening up your hips and shoulders simultaneously. It's also supposed to be really good for improving your posture, which, let's be honest, most of us could use, especially if you spend a lot of time sitting at a desk. I've noticed that after doing this pose regularly, my upper back feels less stiff, and I don't slouch quite as much. Plus, it's a nice little mental break too, because you really have to focus on what you're doing.
Here's a basic way to get into it:
- Start seated with your knees bent and feet on the floor.
- Cross your knees, stacking one on top of the other as best you can. The goal is to get your knees in line, but don't force it.
- Reach one arm overhead, bending at the elbow to reach down your back. Simultaneously, reach your other arm behind your back, trying to clasp your hands together. Use a strap if your hands don't meet.
It's important to listen to your body and not push yourself too hard. If you feel any sharp pain, back off. The goal is to feel a stretch, not to injure yourself. Remember to breathe deeply throughout the pose, which helps to relax your muscles and deepen the stretch.
I find that holding the pose for about 30 seconds to a minute on each side is a good starting point. And don't worry if you can't get your knees perfectly stacked or your hands to clasp. Just focus on feeling the stretch and breathing into it. With practice, you'll gradually increase your flexibility and find the pose becomes more accessible. It's a great way to counteract the effects of sitting all day and just generally feel more open and relaxed.
7. Firelog Pose
Okay, so Firelog Pose... it looks easier than it is, trust me. It's a real hip opener, and you might feel it intensely, especially if you've been sitting all day. I know I do!
Here's the deal:
- Start seated with your legs extended.
- Bend your right knee and place your right foot on top of your left thigh, as close to your knee as comfortable. Think of stacking your shin over your ankle.
- Then, bend your left knee and slide your left foot under your right knee, trying to stack your left shin under your right shin. The goal is to get your knees stacked on top of each other. Don't worry if they aren't perfectly aligned; just go as far as you can without forcing it.
- Sit up tall, lengthen your spine, and breathe. You should feel a stretch in your outer hips. If you want a deeper stretch, gently fold forward from your hips, keeping your back straight as much as possible.
- Hold for about a minute, then switch sides.
Listen to your body! If you feel any sharp pain, back off. It's okay if your knees are way up in the air. The important thing is to feel a stretch, not to force yourself into a perfect pose. You can always use a blanket or block under your top knee for support.
It's a great pose for improving hip mobility and releasing tension. Plus, it's a good one to do before or after a run or any activity that tightens your hips. Give it a try, and see how it feels!
8. Bound Angle Pose
Okay, so Bound Angle Pose (Baddha Konasana) is up next. I remember the first time I tried this one – my hips were screaming! But stick with it, it gets easier (sort of).
This pose is great for opening up your hips and inner thighs. It's also supposed to be good for stimulating abdominal organs, which, you know, is always a plus.
Here's how I usually do it:
- Sit on the floor with your knees bent and the soles of your feet together.
- Let your knees fall open to the sides. Don't force it; just let gravity do its thing.
- Try to bring your heels as close to your groin as is comfortable. Again, no need to push it.
- Sit up tall, lengthen your spine, and maybe even gently fold forward if it feels good. I usually just stay upright.
I find that focusing on my breath really helps in this pose. Inhale to lengthen the spine, exhale to relax deeper into the hip opening. It's a nice way to calm down after a hectic day.
If your hips are super tight, like mine were, you can sit on a folded blanket or cushion to elevate your hips a bit. It makes a world of difference. You can also use blocks under your knees for support. This pose is also known as reclined bound angle pose if you are lying down.
9. Happy Baby Pose
Happy Baby is a super chill pose that's great for winding down. It's like giving yourself a gentle hug from the inside out. This pose is fantastic for opening up your hips and releasing tension in your lower back. It's also just a fun pose to do – who doesn't want to pretend they're a happy baby?
Here's how to get into it:
- Lie on your back and bring your knees towards your chest.
- Grab the outside edges of your feet with your hands. If you can't reach, grab your ankles or shins – whatever works!
- Gently pull your knees down towards your armpits, keeping your feet flexed.
- Relax your shoulders and back into the mat. You can gently rock from side to side to massage your lower back.
Remember to breathe deeply and relax into the pose. There's no need to force anything. If you feel any pain, ease up a bit. You can hold the pose for 30 seconds to a minute, or even longer if it feels good. It's a great way to end your yoga session and transition into relaxation.
10. Frog Pose
This one's a doozy, folks! Frog pose is intense, no sugarcoating it. It really targets your groin muscles, your core, those inner thighs that never get enough love, and your lower back. Get ready to feel it!
- Start on your hands and knees, like you're about to crawl.
- Slowly widen your knees as far as they'll comfortably go, keeping your inner thighs on the floor. Make sure your ankles are in line with your knees.
- Walk your hands forward, lowering your chest and belly toward the floor. You can rest on your forearms or go all the way down, whatever feels okay. The goal is to feel a stretch, not pain.
- Hold the pose for about 30 seconds to a minute, breathing deeply. Try to relax into the stretch.
Listen to your body! If you feel any sharp pain, back off immediately. This pose isn't about pushing yourself to the limit; it's about finding a comfortable stretch and breathing into it. You can always modify by placing a blanket under your knees for extra padding.
Frog pose can be a game-changer for hip flexibility. It's not always the most comfortable, but the benefits are worth it. Just remember to take it slow and listen to what your body is telling you.
Wrap-Up: Embrace the Journey to Flexibility
So there you have it! Ten hip-opening yoga poses that can really help you feel more flexible and relaxed. Whether you're a seasoned yogi or just starting out, these poses can make a difference. Remember, it’s all about listening to your body and finding what feels good for you. Try to incorporate a few of these into your daily routine and see how your hips respond. You might be surprised by the changes in your body and mind. So roll out your mat, take a deep breath, and enjoy the journey to more open hips!
Frequently Asked Questions
What are hip openers in yoga?
Hip openers are yoga poses that help increase flexibility and mobility in the hips. They can relieve tightness and tension in this area.
How often should I practice hip opener poses?
It's good to practice hip openers a few times a week. You can start with short sessions and gradually increase the duration as you become more comfortable.
Can hip openers help with lower back pain?
Yes, hip openers can help ease lower back pain by improving flexibility and reducing tension in the hips, which often affects the lower back.
Are there specific hip openers for beginners?
Yes, poses like Bound Angle Pose and Happy Baby Pose are great for beginners as they are gentle and easy to perform.
How long should I hold each hip opener pose?
Aim to hold each pose for about 30 seconds to 2 minutes. Listen to your body and adjust based on how you feel.
Can I do hip openers if I'm not very flexible?
Absolutely! Hip openers can be adapted for all levels of flexibility. Start with what feels comfortable and gradually work towards deeper stretches.

