
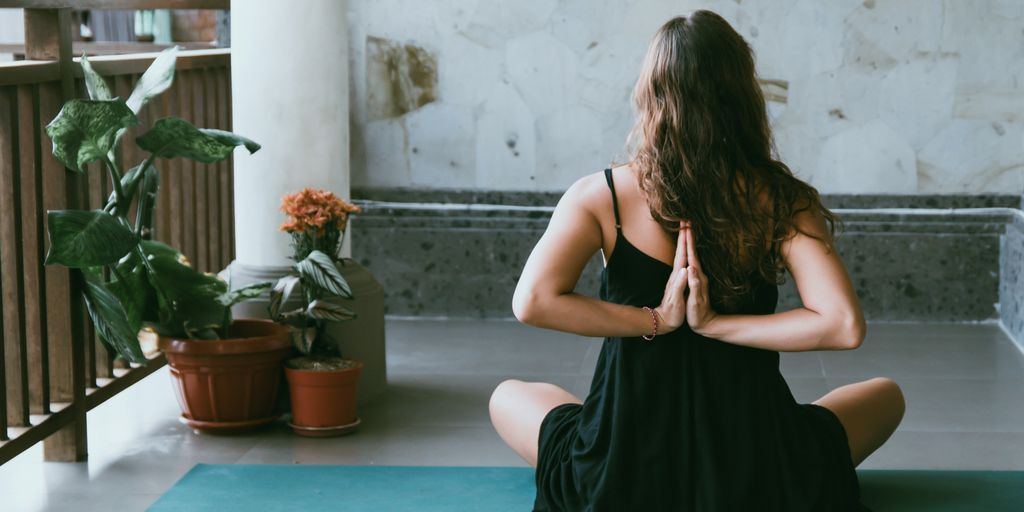
Transform Your Flexibility: 10 Essential Hip Openers Yoga Poses for Every Practitioner
If you're looking to increase your flexibility, especially in your hips, yoga is a fantastic way to do it. Hip openers yoga poses can help release tension, improve mobility, and even enhance your overall well-being. Whether you're just starting out or have been practicing for a while, these ten essential poses will guide you on your journey to more open and flexible hips. Let's dive into these poses and discover how they can benefit your practice.
Key Takeaways
- Hip openers yoga poses are vital for improving flexibility and mobility.
- Regular practice of these poses can help relieve tension in the hips.
- Incorporating these poses into your routine can enhance your overall yoga experience.
- Each pose targets different areas of the hips, helping to release tightness.
- Consistency is key—make these poses a regular part of your practice.
1. Balasana — Wide Knee Child’s Pose
Okay, so, Child’s Pose. It's like the yoga equivalent of a warm hug. Seriously, if you're feeling stressed, overwhelmed, or just plain blah, this pose is your go-to. It's super gentle, and almost anyone can do it, no matter their flexibility level. I like to think of it as a mini-retreat right on my yoga mat.
To get into it, start on your knees. Then, widen your knees a bit – maybe about hip-width apart, or even a little wider if that feels good. The key is to keep your big toes touching. Now, sink your hips back towards your heels. If your hips don't quite reach your heels, that's totally fine! Just go as far as you comfortably can. Next, fold forward, draping your torso between your thighs. Let your forehead rest on the mat. If your forehead doesn't reach, you can use a block or a folded blanket for support. Extend your arms forward, palms down, or you can rest them alongside your body, palms up, for a more relaxed version. The goal is to completely relax and let go of any tension.
I find that focusing on my breath really helps me sink deeper into the pose. Inhale deeply, feeling your belly press against your thighs, and exhale slowly, releasing any tightness in your hips and lower back. I usually stay in Child's Pose for at least five breaths, but sometimes I'll hang out there for much longer if I need it. It's a great way to open the hips and calm the mind.
It's also a fantastic pose to use as a resting pose between more challenging postures. If you're in the middle of a tough yoga sequence and need a break, just drop into Child's Pose for a few breaths to recharge. It's like hitting the reset button for your body and mind.
2. Pigeon Pose
Pigeon Pose is a great way to really open up those hips. If you're someone who sits a lot, or maybe you've got some lower back issues, this pose can be a game-changer. It targets the piriformis muscle, psoas, thighs, groin, and back, all in one go. It's a pretty intense stretch, so listen to your body and don't push it too far, especially if you're just starting out.
Here's a simple way to get into it:
- Start in downward-facing dog. It's a good starting point for many poses.
- Bring your right knee forward, placing it on the floor outside your right hand. Try to get your lower leg parallel to the front of your mat, but don't worry if it's not perfect.
- Release your left knee to the floor, untucking your toes. Make sure your hips are squared toward the front.
- If you feel stable, you can either stay upright, opening your chest, or fold forward over your front leg for a deeper stretch. Holding the forward fold allows for a deeper release.
It's recommended to stay in the pose for about 10 to 20 deep breaths. Consistency is key; doing this every day can really make a difference. If pigeon pose feels too intense, there's a modification you can try. It's called eye of the needle pose, and it's basically the same stretch but done lying on your back. It can be a gentler way to get the benefits of the stretch without as much pressure. Remember to focus on your breath and relax into the pose as much as possible. This will help you get the most out of the hip opener.
Pigeon pose can sometimes bring up emotions. It's believed that we store tension in our hips, so as you release that tension, you might also release some emotional baggage. Don't be surprised if you feel a little emotional during or after this pose. Just acknowledge it and let it pass.
3. Lizard Pose
Okay, so Lizard Pose. This one can feel intense, but in a good way! It's a fantastic way to really get into those hips and open things up. I remember the first time I tried it, I was so tight I could barely get down, but with practice, it's become one of my favorites. It's also known as Utthan Pristhasana, which sounds way fancier than it feels, trust me.
To get into it, start in a low lunge. Then, walk both hands to the inside of your front foot. You can stay here, or you can lower your back knee to the ground for a deeper stretch. Some people even go down onto their forearms. Listen to your body and don't push it too hard.
The key is to keep breathing and relax into the pose.
Here are a few things you can try to modify or deepen the pose:
- Lower the back knee to the mat.
- Come down onto your forearms.
- Let the front knee fall open to the side.
- Try a twist by rolling to the side and grabbing your back foot.
I find that holding Lizard Pose for a few breaths really helps release tension in my hips. It's not always comfortable, but the feeling afterward is worth it. Just remember to be gentle with yourself and don't force anything.
Another variation is the Lizard Pose Twist. From Lizard Pose, roll onto your right quad and open your chest to out to the left. Bend your right knee and grab your right foot with your left hand. Hold for at least 5 breaths and then repeat on the other side. This is another variation on Lizard Pose that stretches the hip flexors and quads in addition to the outer hip (adductor) muscles, like the gluetus medius.
4. Butterfly Pose
The Butterfly Pose, also known as Baddha Konasana, is a great way to gently open your hips and inner thighs. It's a pretty accessible pose for most people, but it can be modified to suit different levels of flexibility. I find it particularly helpful after a long day of sitting.
This pose is known for its ability to release tension in the hips and groin area.
Here's how I usually do it:
- Sit on the floor with your spine straight.
- Bring the soles of your feet together, letting your knees fall open to the sides.
- Hold onto your feet or ankles, and gently flutter your knees up and down like butterfly wings. You can improve mobility by doing this regularly.
- For a deeper stretch, you can lean forward from your hips, keeping your back straight as much as possible.
I like to hold this pose for a few minutes, focusing on my breath and trying to relax into the stretch. It's not about how far you can go, but about how much you can release.
5. Frog Pose
Okay, Frog Pose. This one can be intense, so listen to your body! It's a great way to really open up those inner thighs and groin. I remember the first time I tried it, I was so tight I could barely get into position. Now, it's a regular part of my routine, and I feel so much more open afterward.
The Frog Pose is a deep hip opener that can improve flexibility and release tension in the groin and inner thighs.
Here's how I usually get into it:
- Start on your hands and knees, like you're about to do a cat-cow. Make sure you have a comfortable seated position.
- Slowly widen your knees, keeping your inner thighs on the ground. Your ankles should be in line with your knees.
- Lower down onto your forearms, keeping your head and neck relaxed. You can also rest your forehead on the ground if that feels better.
- Breathe deeply and relax into the pose. You should feel a stretch in your inner thighs and groin. Don't push it too far – listen to your body!
I find that holding the pose for about a minute really helps me feel the stretch. Sometimes I even rock gently back and forth to deepen it. Just remember to breathe and stay relaxed. If you feel any sharp pain, ease up a bit.
It's definitely a pose that gets easier with practice. Don't be discouraged if you can't get all the way down at first. Just keep working at it, and you'll see progress over time. It's worth it for the increased flexibility and the release of tension. I've found it's also great for relieving lower back pain. Give it a try and see how it works for you!
6. Bound Angle Pose
Bound Angle Pose, also known as Cobbler's Pose or Baddha Konasana, is a great way to open up your hips and groin. I remember the first time I tried this pose; it felt super awkward, but with practice, it's become one of my favorites for releasing tension. It's also a really calming pose, which is always a plus.
Here's how to do it:
- Sit on the floor with your knees bent and the soles of your feet together.
- Let your knees fall open to the sides.
- Bring your heels as close to your groin as is comfortable.
- Sit up tall, lengthening your spine.
- You can stay upright or gently fold forward, keeping your back straight as much as possible.
I find that focusing on my breath really helps me relax into this pose. Inhale deeply, and as you exhale, imagine your hips opening a little more. It's amazing how much tension we hold in our hips without even realizing it.
This pose is not just about flexibility; it's also about body awareness. It encourages you to connect with your body and notice any areas of tightness or discomfort. Plus, it's a nice way to wind down after a long day. If you're looking to improve your posture, this pose can help with that too. It encourages a tall, upright spine, which is something we could all use a little more of, right?
Give it a try and see how it feels for you! You might be surprised at how much it helps.
7. Low Lunge

Low Lunge, or Anjaneyasana, is a fantastic pose to incorporate into your routine. I find it really helps to open up my hips and stretch out my thighs. It's also a great way to boost your energy levels, especially after a long day of sitting.
To get into it, start from a standing position and step one foot back into a lunge. Then, gently lower your back knee to the floor. Make sure your front knee is directly over your ankle. You should feel a nice stretch in your hip flexors. This pose is excellent for improving flexibility and relieving tension in the lower body.
Here are a few things I like to focus on when doing Low Lunge:
- Keep your chest open and your spine long.
- Engage your core to maintain balance.
- Breathe deeply and relax into the stretch.
I've noticed that holding the Low Lunge for a few breaths each day has really improved my hip mobility. It's become a staple in my warm-up routine before any kind of physical activity. Plus, it just feels good to stretch out those tight muscles!
If you're looking to work into your hamstrings, try straightening your back leg. This will deepen the stretch and challenge your balance a bit more. Just remember to listen to your body and don't push yourself too hard, especially if you're new to the pose.
8. Half Pigeon Pose
Half Pigeon Pose, or Ardha Kapotasana, is a fantastic way to really get into those hips. It's a pose that can feel intense, but with consistent practice, you'll find it becomes more accessible and deeply rewarding. It's one of my favorites because it targets the psoas muscle, which can hold a lot of tension.
To get into it, start in a downward-facing dog. Bring one knee forward, placing it behind your wrist on the same side. Angle your shin so it's roughly parallel with the front edge of your mat, but don't worry if it's not perfectly straight. The important thing is to listen to your body and not force anything. Extend your back leg straight behind you, making sure your hips are squared toward the front. Inhale to lengthen your spine, and as you exhale, fold forward over your front leg. You can rest your forearms on the ground or even lower your forehead to the mat for a deeper stretch. Remember to breathe deeply and relax into the pose.
- Start in Downward-Facing Dog.
- Bring your right knee forward to the floor on the outside of your right hand.
- Release your left knee to the floor.
- Square your hips towards the front of your mat.
- If you feel stable, bring your torso down into a forward bend over your right leg.
Half Pigeon can be quite intense, so it's important to listen to your body and not push yourself too far. If you're feeling any knee pain, ease up or try a modification like reclining pigeon pose. Remember, yoga is about finding your edge, not exceeding it.
Half Pigeon Pose is a great way to open up the hips and release tension. If you're looking for a gentler option, try the supine pigeon variation.
9. Reclining Bound Angle Pose
This pose is a super chill way to open up your hips while lying down. It's like Bound Angle Pose, but, you know, horizontal. It's great for relaxation and can even be used as a substitute for Savasana. It's a really nice way to end a practice or just unwind after a long day.
To get into it, start by sitting with the soles of your feet together and your knees falling open. Then, slowly lower yourself down to the floor, using your hands and elbows for support. You can place pillows or blankets under your knees for extra comfort if needed. Just breathe and let gravity do its thing.
I find this pose particularly helpful when I'm feeling stressed or anxious. The gentle opening of the hips combined with the supported reclined position is incredibly soothing. It's like a mini-vacation for your body and mind.
Here are some of the benefits:
- Opens the hips and inner thighs
- Calms the mind and reduces stress
- Improves circulation
- Can relieve mild depression and fatigue
If you're looking for a restorative yoga pose that's also a hip opener, Reclining Bound Angle Pose is definitely worth a try.
10. Happy Baby Pose
Happy Baby pose, or Ananda Balasana, is a super chill way to end your hip-opening sequence. It's like giving your hips a gentle hug from the inside out. This pose is great for releasing tension in your lower back and groins.
Here's how to get into it:
- Lie on your back.
- Bring your knees towards your chest.
- Grab the outside edges of your feet with your hands (or shins if that's too much).
- Keep your feet flexed and gently pull your knees down towards the floor, widening them apart.
- Think about bringing your sacrum flat onto the floor. You can gently rock from side to side for a little massage.
I find that focusing on keeping my lower back pressed into the mat really helps deepen the stretch and makes it feel even better. It's also a good reminder to breathe deeply and relax into the pose. If you have tight hamstrings, don't worry if you can't fully straighten your legs. Just focus on the feeling of opening in your hips.
This pose is also known for its calming effects. It can help to promote relaxation and reduce stress. It's a great way to wind down after a long day or a challenging yoga session. So, go ahead, embrace your inner happy baby!
Final Thoughts on Hip Flexibility
Improving your hip flexibility takes time and effort. It's not something that happens overnight. By regularly practicing these hip-opening poses, you can gradually see changes. You'll likely notice better movement, less discomfort, and maybe even a lighter emotional state. So, make these poses a part of your routine. Whether you do them daily or a few times a week, consistency is key. Remember, every little bit helps, and your hips will thank you for it!
Frequently Asked Questions
What are hip openers in yoga?
Hip openers are yoga poses that help stretch and relax the muscles around the hips. They can improve flexibility and reduce tightness.
How often should I practice hip openers?
It's a good idea to practice hip openers regularly, at least a few times a week, to see improvements in flexibility and comfort.
Can beginners do these poses?
Yes, these hip opener poses are suitable for all levels, including beginners. Just listen to your body and don't push too hard.
What should I do if I feel pain while doing these poses?
If you feel pain, stop the pose and rest. It's important to avoid pushing through pain. You can also consult a yoga teacher for guidance.
How long should I hold each pose?
Try to hold each hip opener pose for at least 30 seconds to a minute. This allows your muscles to relax and stretch properly.
Are there any benefits to doing hip openers?
Yes! Hip openers can help increase flexibility, improve posture, reduce stress, and even release emotional tension stored in the hips.